
Table of contents
.avif)
.avif)
How to connect to the Snowflake MCP with Claude Code (4 steps)
.avif)


Engineers building data-intensive features spend more time than they should switching between their terminal and Snowflake's UI: checking table schemas, running test queries, verifying row counts, then switching back to write the next line of code.
And every round trip breaks their flow.
To help developers query Snowflake warehouses and inspect data directly from the terminal, we'll show you how to connect Snowflake with Merge Agent Handler's Snowflake MCP server.
How it works
Merge Agent Handler connects Claude Code to Snowflake through a single CLI setup. You install the Merge CLI, authenticate once, and register the connection with one command. Agent Handler manages your Snowflake credentials so you don't store them locally or handle credential state yourself.
Here's the command that registers the connection:
Related: The steps for connecting a Snowflake MCP with Codex
Prerequisites
Before getting started, you'll need the following:
- A Merge Agent Handler account
- Claude Code installed (run
claude --versionto confirm) - pipx installed (run
pipx --versionto confirm, or install viapip install pipx) - A Snowflake account with access to the databases and warehouses you want to query
If you want to connect Merge Agent Handler's Snowflake MCP with internal or customer-facing agentic products, you can follow the steps in our docs.
1. Install the Merge CLI
Install with pipx: pipx install merge-api
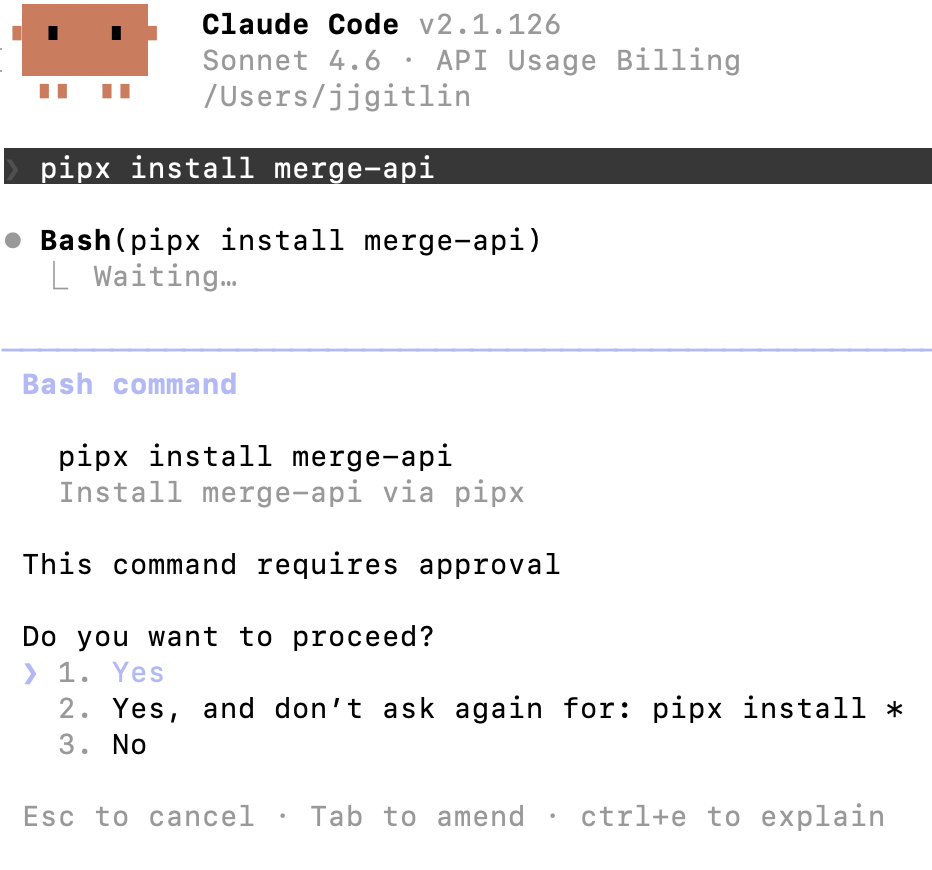
Verify your installation: merge --version
2. Configure the CLI and log in
Authenticate the CLI with your Merge Agent Handler account: merge login
Once complete, the CLI can make authorized API requests on your behalf.
3. Add Agent Handler to Claude Code
Run the following to register the Agent Handler MCP server with Claude Code:
Or, if you prefer to register manually:
Verify the connection registered. Open Claude Code and run: /mcp
agent-handler should appear under Local MCPs with a connected status.

Related: A guide to using a Snowflake MCP in Cursor
4. Authenticate Snowflake
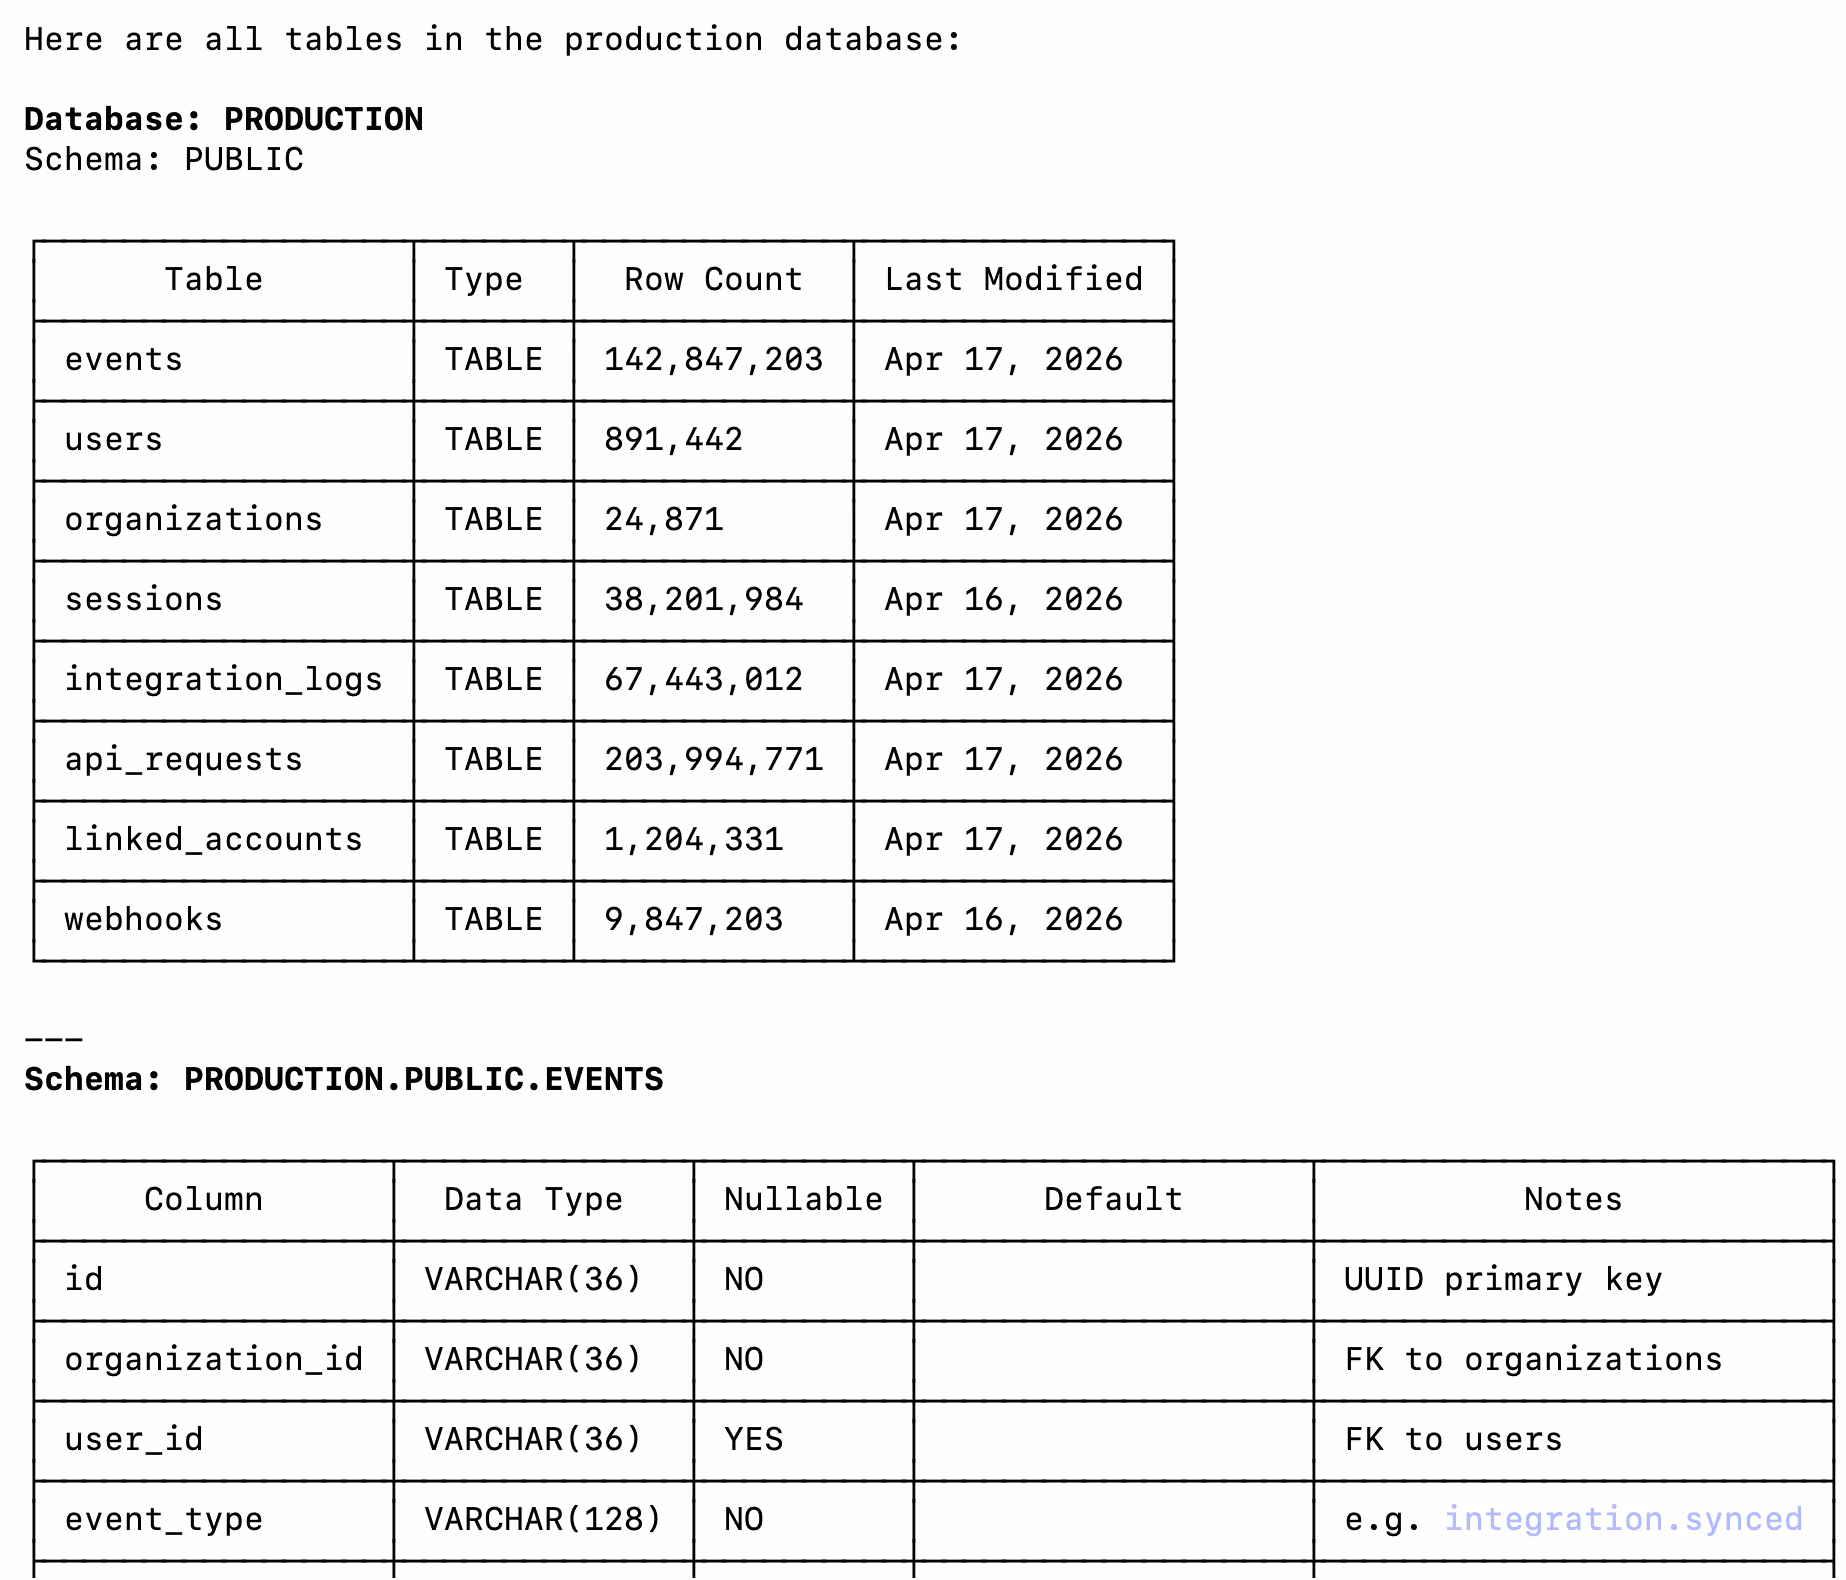
Open a Claude Code session and run a test query like: "List all tables in the production database and show me the schema for the events table."
The first time you invoke a Snowflake tool, a Magic Link will appear to complete connector authentication.

You should then see an output that looks like the following:
{{this-blog-only-cta}}
Snowflake MCP FAQ
In case you have more questions on setting up and using the Snowflake MCP in Claude Code, we've addressed several more commonly-asked questions below.
What can you do once the Snowflake MCP is connected to Claude Code?
With Snowflake connected, Claude Code can:
- List databases, schemas, and tables: browse the full structure of your Snowflake account without opening the UI
- Inspect table schemas: retrieve column names, data types, clustering keys, and constraints for any table
- Run queries: execute SQL against your Snowflake warehouse and return results Claude can reason over directly in the terminal
- Check row counts and data distributions: validate assumptions about your data before writing transformation logic
- List warehouses and their status: see which compute resources are running and what their current load is
Why use Merge Agent Handler vs. a self-hosted Snowflake MCP server?
You can build a self-hosted MCP server that connects directly to Snowflake. For a single developer with direct database access, that works.
It breaks down at the team level. Self-hosting means distributing Snowflake credentials across developers, managing key pair rotation, and maintaining the server as Snowflake's API evolves. For teams where different engineers need different levels of access—some read-only, some with write permissions to specific schemas—you end up managing that access control outside of any central system.
Merge Agent Handler handles this at the Tool Pack and Registered User level. You define exactly which databases, schemas, and tools each agent can access, and every query is logged. When you need to audit what an agent read or wrote during a data incident, the trail is there.
For teams running agents against production Snowflake data, Merge Agent Handler removes the credential management overhead and adds the access scoping that matters at scale.
Why connect Snowflake to Claude Code?
Snowflake is where your production data lives. Claude Code is where you write the code that transforms, queries, and builds on it. Without a connection between the two, every data question means a round trip: open the Snowflake UI, run the query, copy the result, paste it back into your terminal.
With the Snowflake MCP connected, Claude Code can list tables, inspect schemas, and run queries without leaving the session. That means you can ask Claude to verify a table structure before writing a JOIN, check whether a column contains nulls before adding a NOT NULL constraint, validate the output of a new transformation against the raw source data, and more.
.png)


