
Table of contents

How to connect your agents to Zendesk MCP via Claude Code
.avif)


Your agents can use the Zendesk MCP to power endless workflows, from escalating urgent tickets to the right team to updating a ticket’s status and notes based on a customer call.
Regardless of your use case, you’ll first need to connect to a Zendesk MCP server.
We’ll walk you through the process with Claude Code and Merge Agent Handler’s Zendesk MCP server.
How it works
Merge Agent Handler handles the connection from Claude Code to Zendesk's API. You install the Merge CLI, log in once, and register the MCP server with a single command. Agent Handler manages your Zendesk OAuth credentials so you never store tokens locally or wire credentials into your codebase.
Here's the command that registers the connection:
Related: How to use a Zendesk MCP in Cursor
Prerequisites
Before getting started, you'll need the following:
- A Merge Agent Handler account
- Claude Code installed (run
claude --versionto confirm) - pipx installed (run
pipx --versionto confirm, or install viapip install pipx) - A Zendesk account with permission to authenticate the connector
If you want to connect Merge Agent Handler's Zendesk MCP with internal or customer-facing agentic products, you can follow the steps in our docs.
1. Install the Merge CLI
Install with pipx: pipx install merge-api
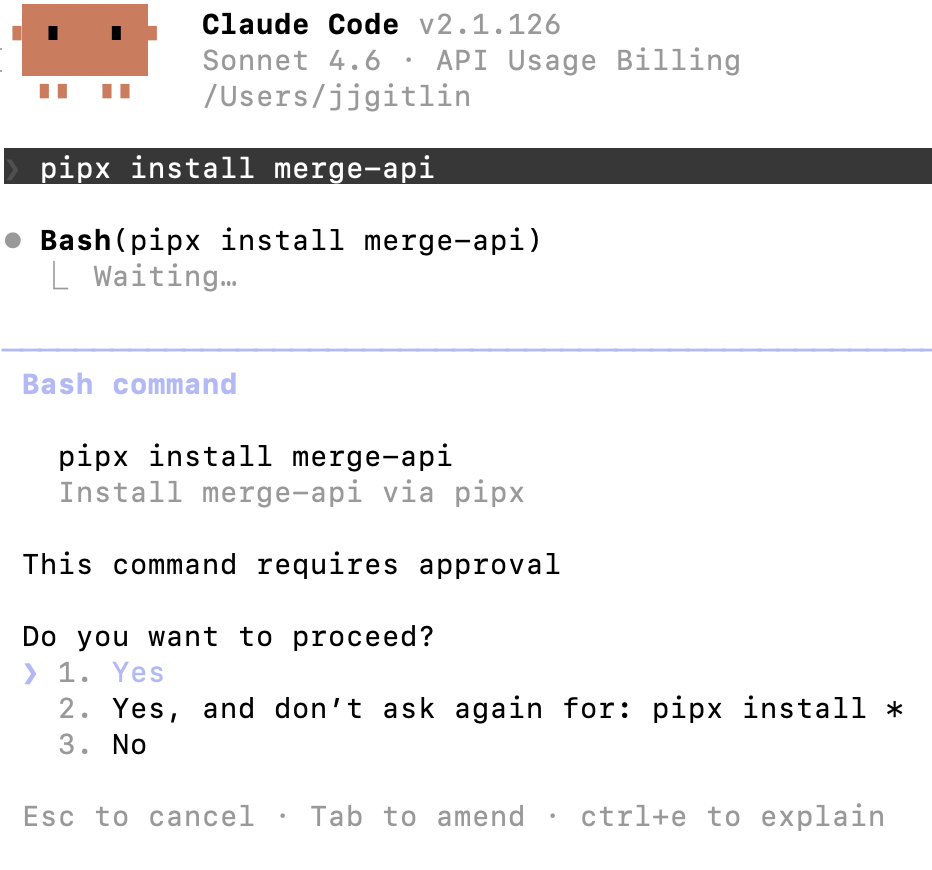
Verify your installation: merge --version
2. Configure the CLI and log in
Run merge login to authenticate your session and link the CLI to your Merge Agent Handler account: merge login
This authenticates your session so the CLI can make authorized requests on your behalf.
3. Add Agent Handler to Claude Code
Register the Agent Handler MCP server with Claude Code:
Or manually:
Open Claude Code and run: /mcp
agent-handler should appear under Local MCPs with a connected status.

Related: The steps for connecting a Zendesk MCP with Codex
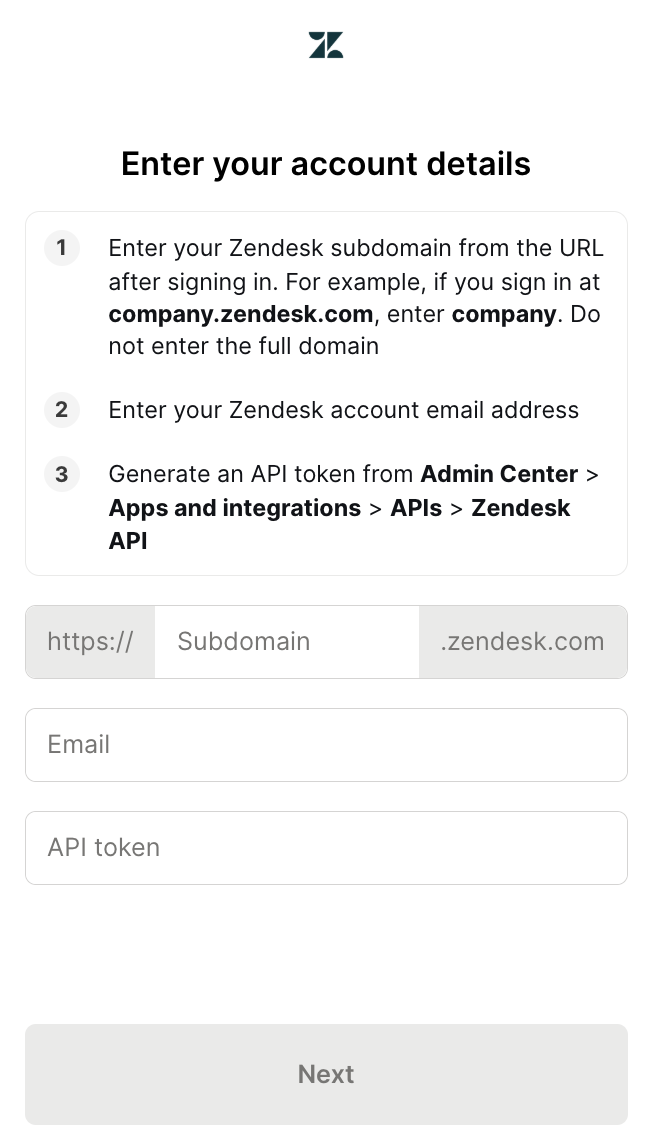
4. Authenticate Zendesk
Open Claude Code and test the connection with a prompt like: "Find all tickets tagged 'billing' opened in the last 48 hours and summarize the top issues reported."
A Magic Link will appear on first use to complete connector authentication.
{{this-blog-only-cta}}
FAQ on using the Zendesk MCP with Claude Code
In case you have any more questions, we've addressed several more below.
What types of tasks can my agents perform with the Zendesk MCP server?
Your agents can perform a wide range of tasks. Here are just a few examples:
- Create support tickets: Your agent can log a new customer issue with a subject, description/comment, requester email, priority, and tags
- Update existing tickets: Your agent can change status, priority, assignee, tags, and other ticket fields
- Pull ticket context for better replies: Your agent can retrieve a ticket and fetch its comment thread before drafting a response
- List and search tickets: Your agent can find open/urgent tickets or pull a queue for a specific team
- Automate ticket triage and routing: Your agent can classify incoming tickets by intent, priority, or customer tier and route/escalate them to the right queue
Why should I use Merge Agent Handler's Zendesk MCP server over other Zendesk MCP servers?
You should use it when you want Zendesk tool-calling that’s ready for production, and not just a raw “agent can hit Zendesk APIs” integration.
Here are more specific reasons:
- Enterprise-grade security and DLP around every tool call: All tool inputs/outputs can be scanned and governed (block/redact/mask sensitive data) before anything reaches Zendesk or comes back to the model, which is important when tickets contain PII, credentials, or internal notes
- Full observability, audit trails, and easier debugging: You get searchable logs/audit trails across agent tool calls, which is critical for investigating “why did the agent update/close/escalate this ticket?” and for debugging failures in production.
- Managed auth + scoped access for end users: Instead of your agent handling Zendesk tokens directly, Agent Handler centralizes auth and scoping via “Registered Users” and Tool Packs, so each end user/tenant can have the right boundaries and the agent only sees the tools you allow
- Tool Packs offer least-privilege Zendesk agents (and multi-system workflows): You can expose only the Zendesk actions you want (e.g., “create ticket” + “add internal note”, but not “delete user” or “export data”) and combine Zendesk with other systems in the same governed tool surface when workflows cross tools
- Less integration overhead as you scale MCP beyond a demo: Agent Handler is designed to remove the long-term burden of building/maintaining MCP connectors, and to keep reliability high as underlying APIs change
Why should I use Claude Code to connect to the Zendesk MCP server?
Here are some reasons to keep in mind:
- Claude Code is an MCP-native client, so it’s a fast way to start calling Zendesk tools without building your own MCP client UX from scratch
- You can prototype and iterate on agent behavior in the same place you write code (prompting, tool selection logic, error handling), which shortens the “idea → working workflow” loop
- It’s great for debugging tool calls. You can quickly run a request, inspect what the model attempted, adjust instructions, and retry
- It makes it easy to validate your tool surface area before you ship. You can confirm your Zendesk tools (and their descriptions/schemas) are sufficient for the workflows you care about
- It’s a practical way to test end-to-end auth + permissions flows (especially when paired with Agent Handler’s Tool Packs and per-user scoping) before integrating the MCP endpoint into your production app
.jpg)
.png)
.png)


