Table of contents

How to create API tokens in Confluence (6 steps)
.avif)


Atlassian Confluence, otherwise known as Confluence, is a popular collaboration and documentation platform that teams use to create, organize, and share information.
To help you create and update information in Confluence from other systems or extract information from the application and use it in your other systems and/or product, you can connect to the platform’s API endpoints.
The first step in building any Confluence integration is creating API tokens. We’ll help you do just that below.
Log into Atlassian
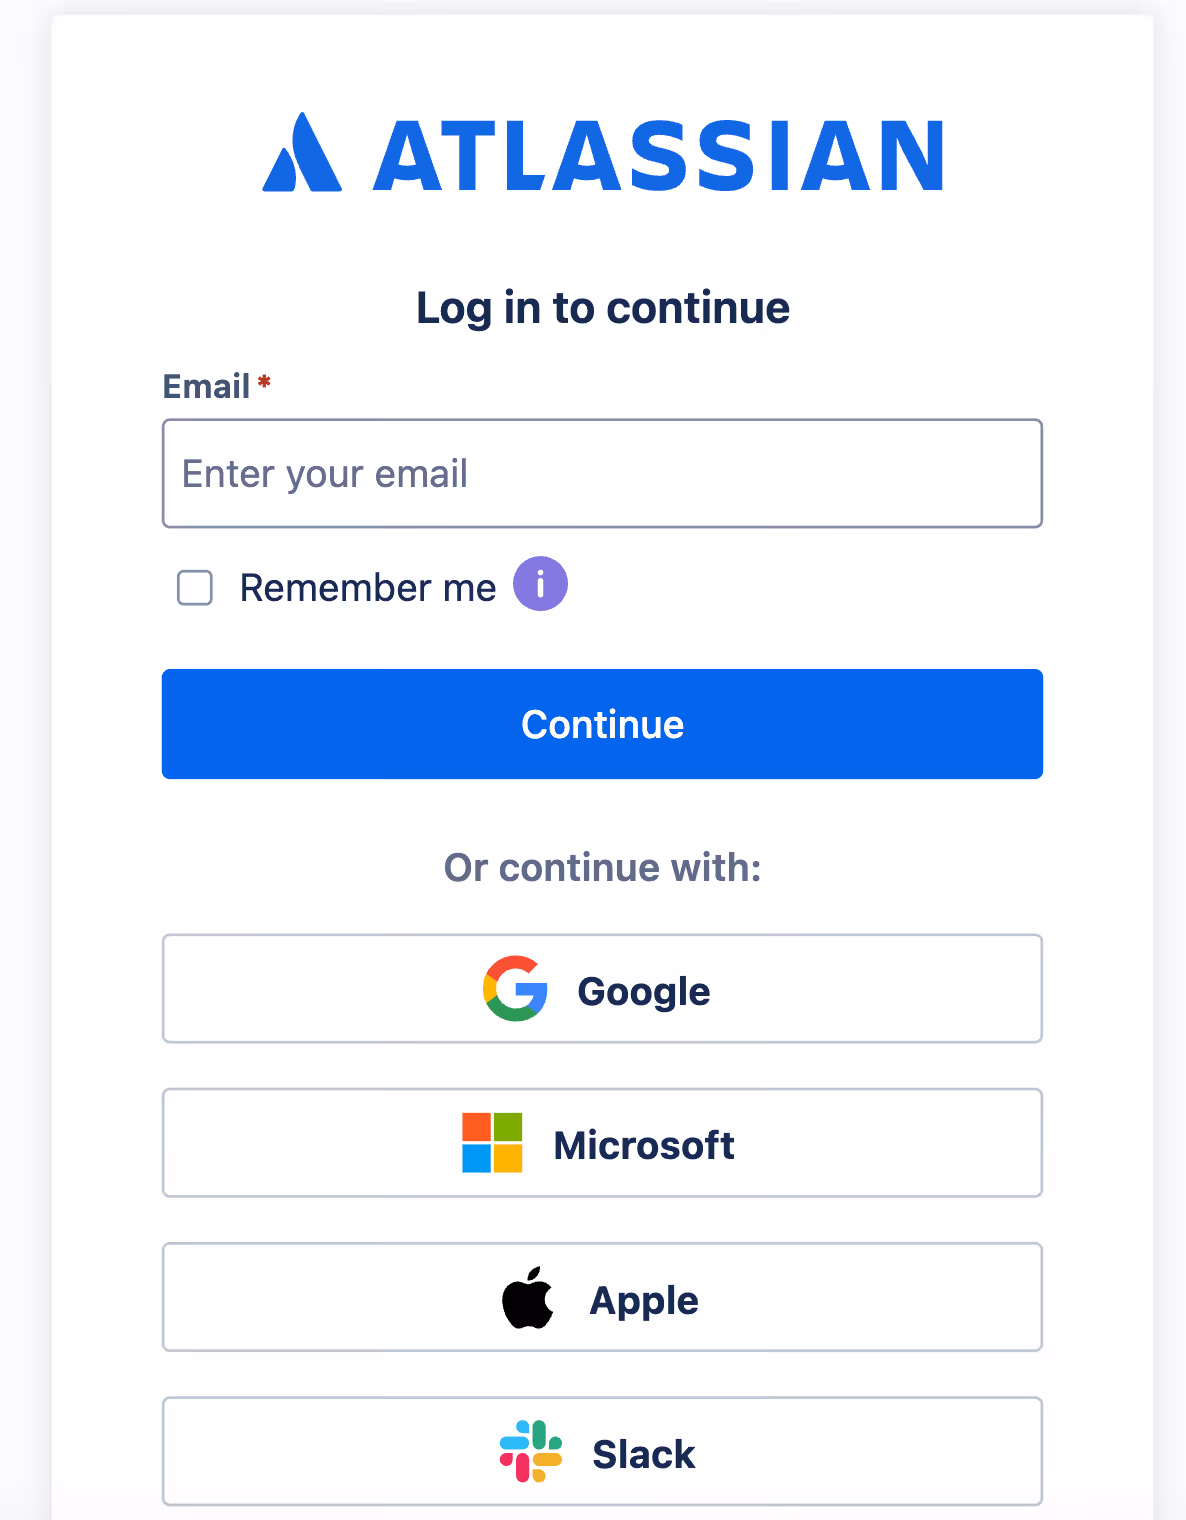
Since Confluence is an Atlassian product, you’ll actually need to generate API tokens in Atlassian.
The first step in doing so is logging into the application here.
Related: A guide to integrating with knowledge base systems
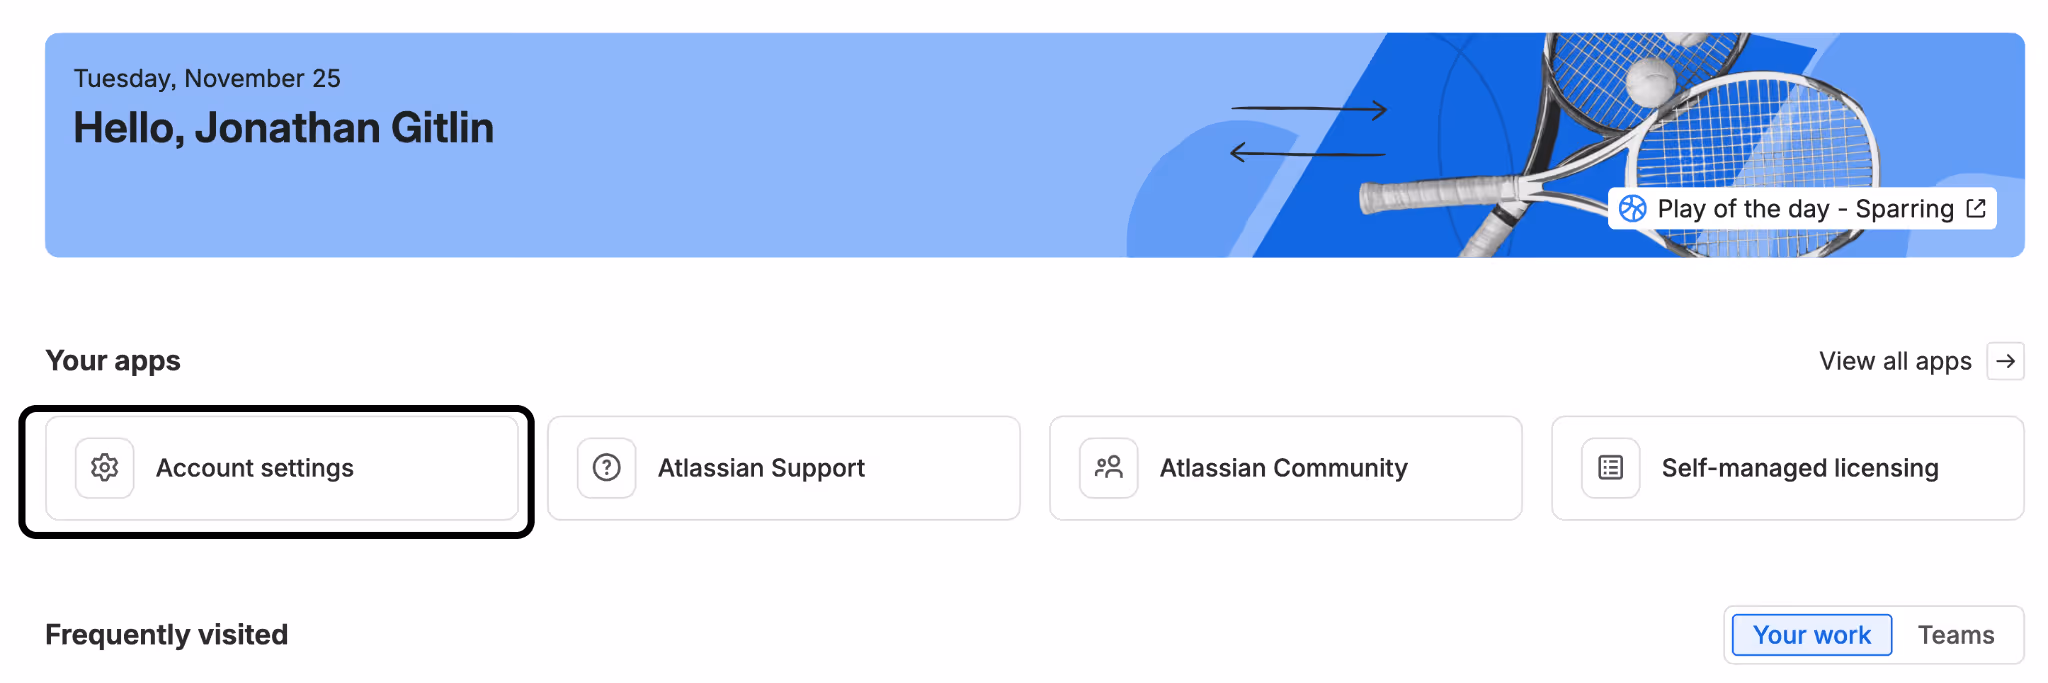
Click on “Account settings”
Once you’re logged in, you’ll land on Atlassian’s homepage by default. Select “Account settings” under the “Your apps” section.
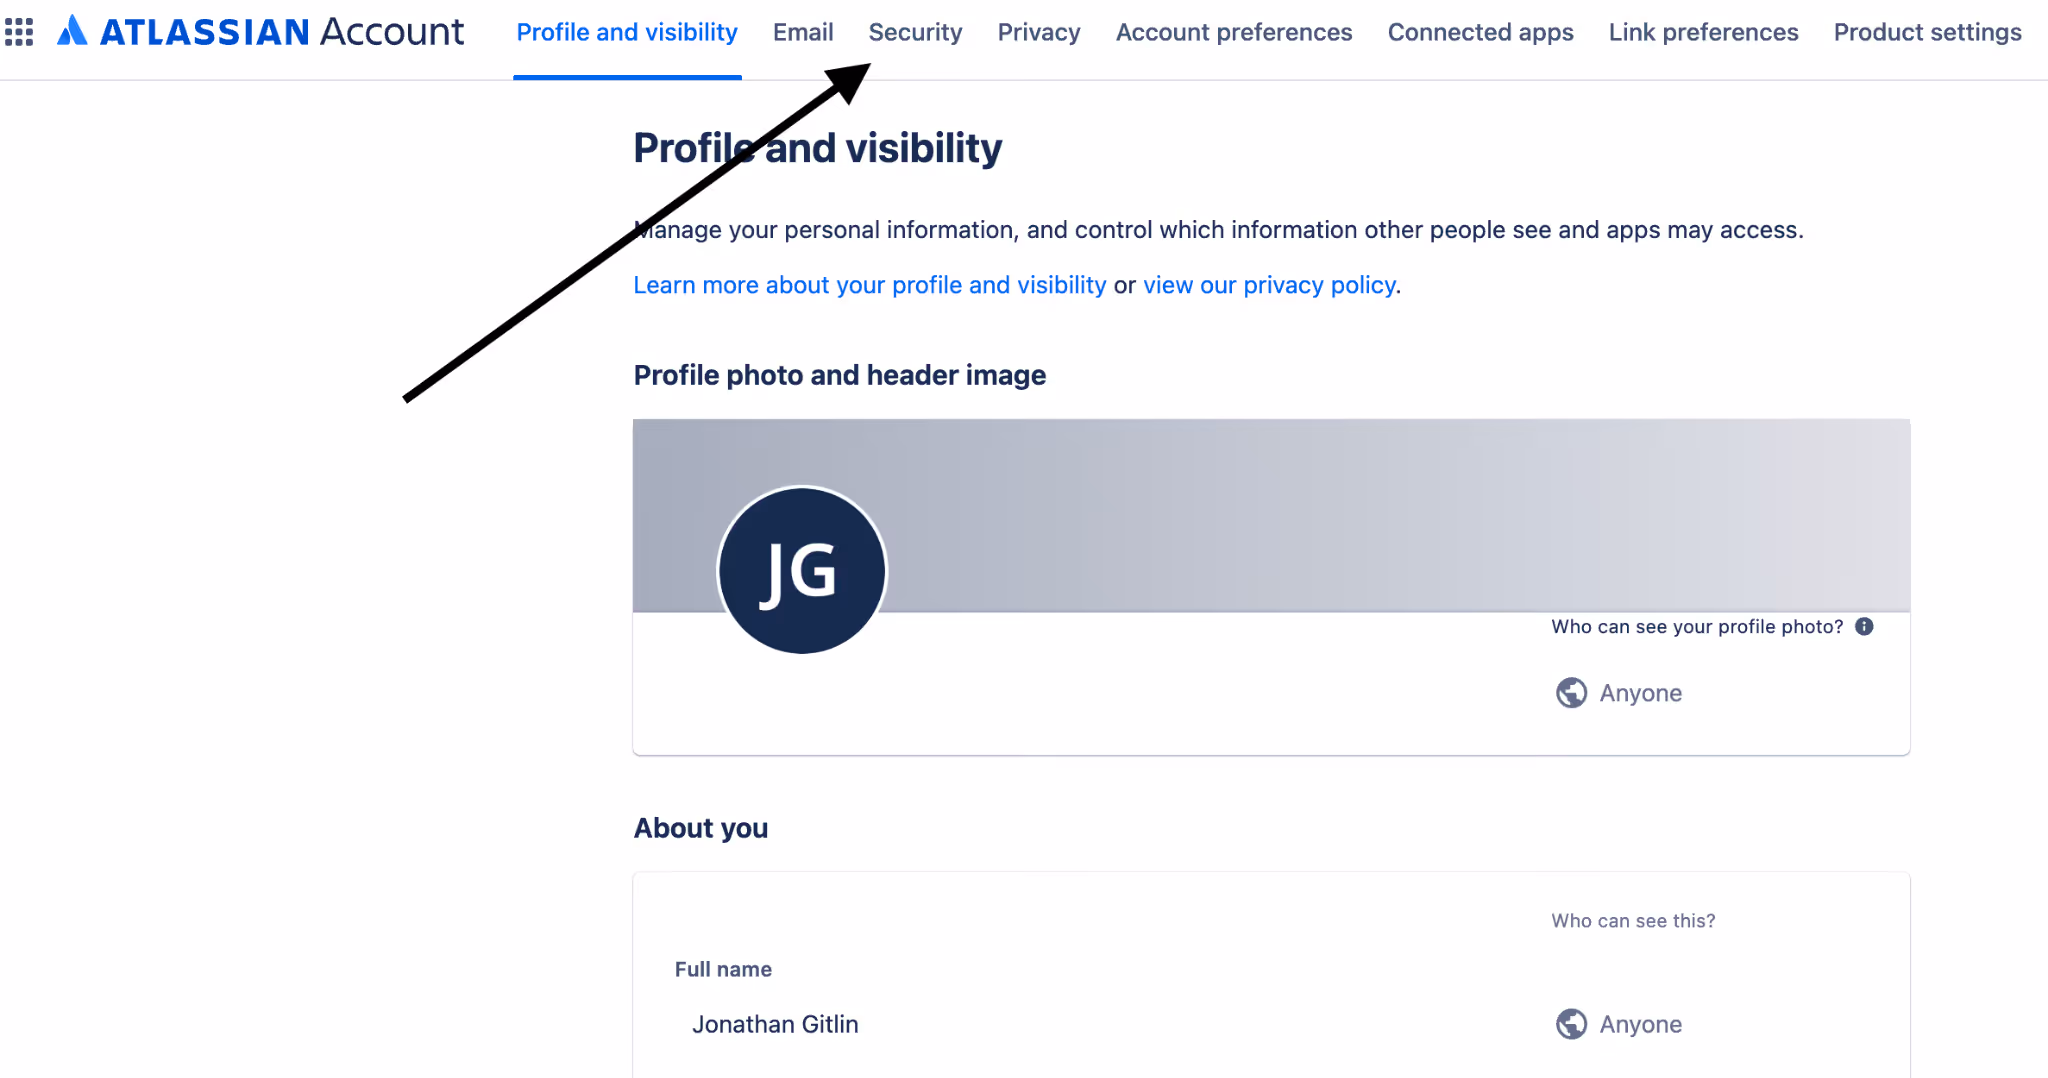
Navigate to the “Security” tab
You’re now on the “Profile and visibility” tab. Hover to the “Security” tab.
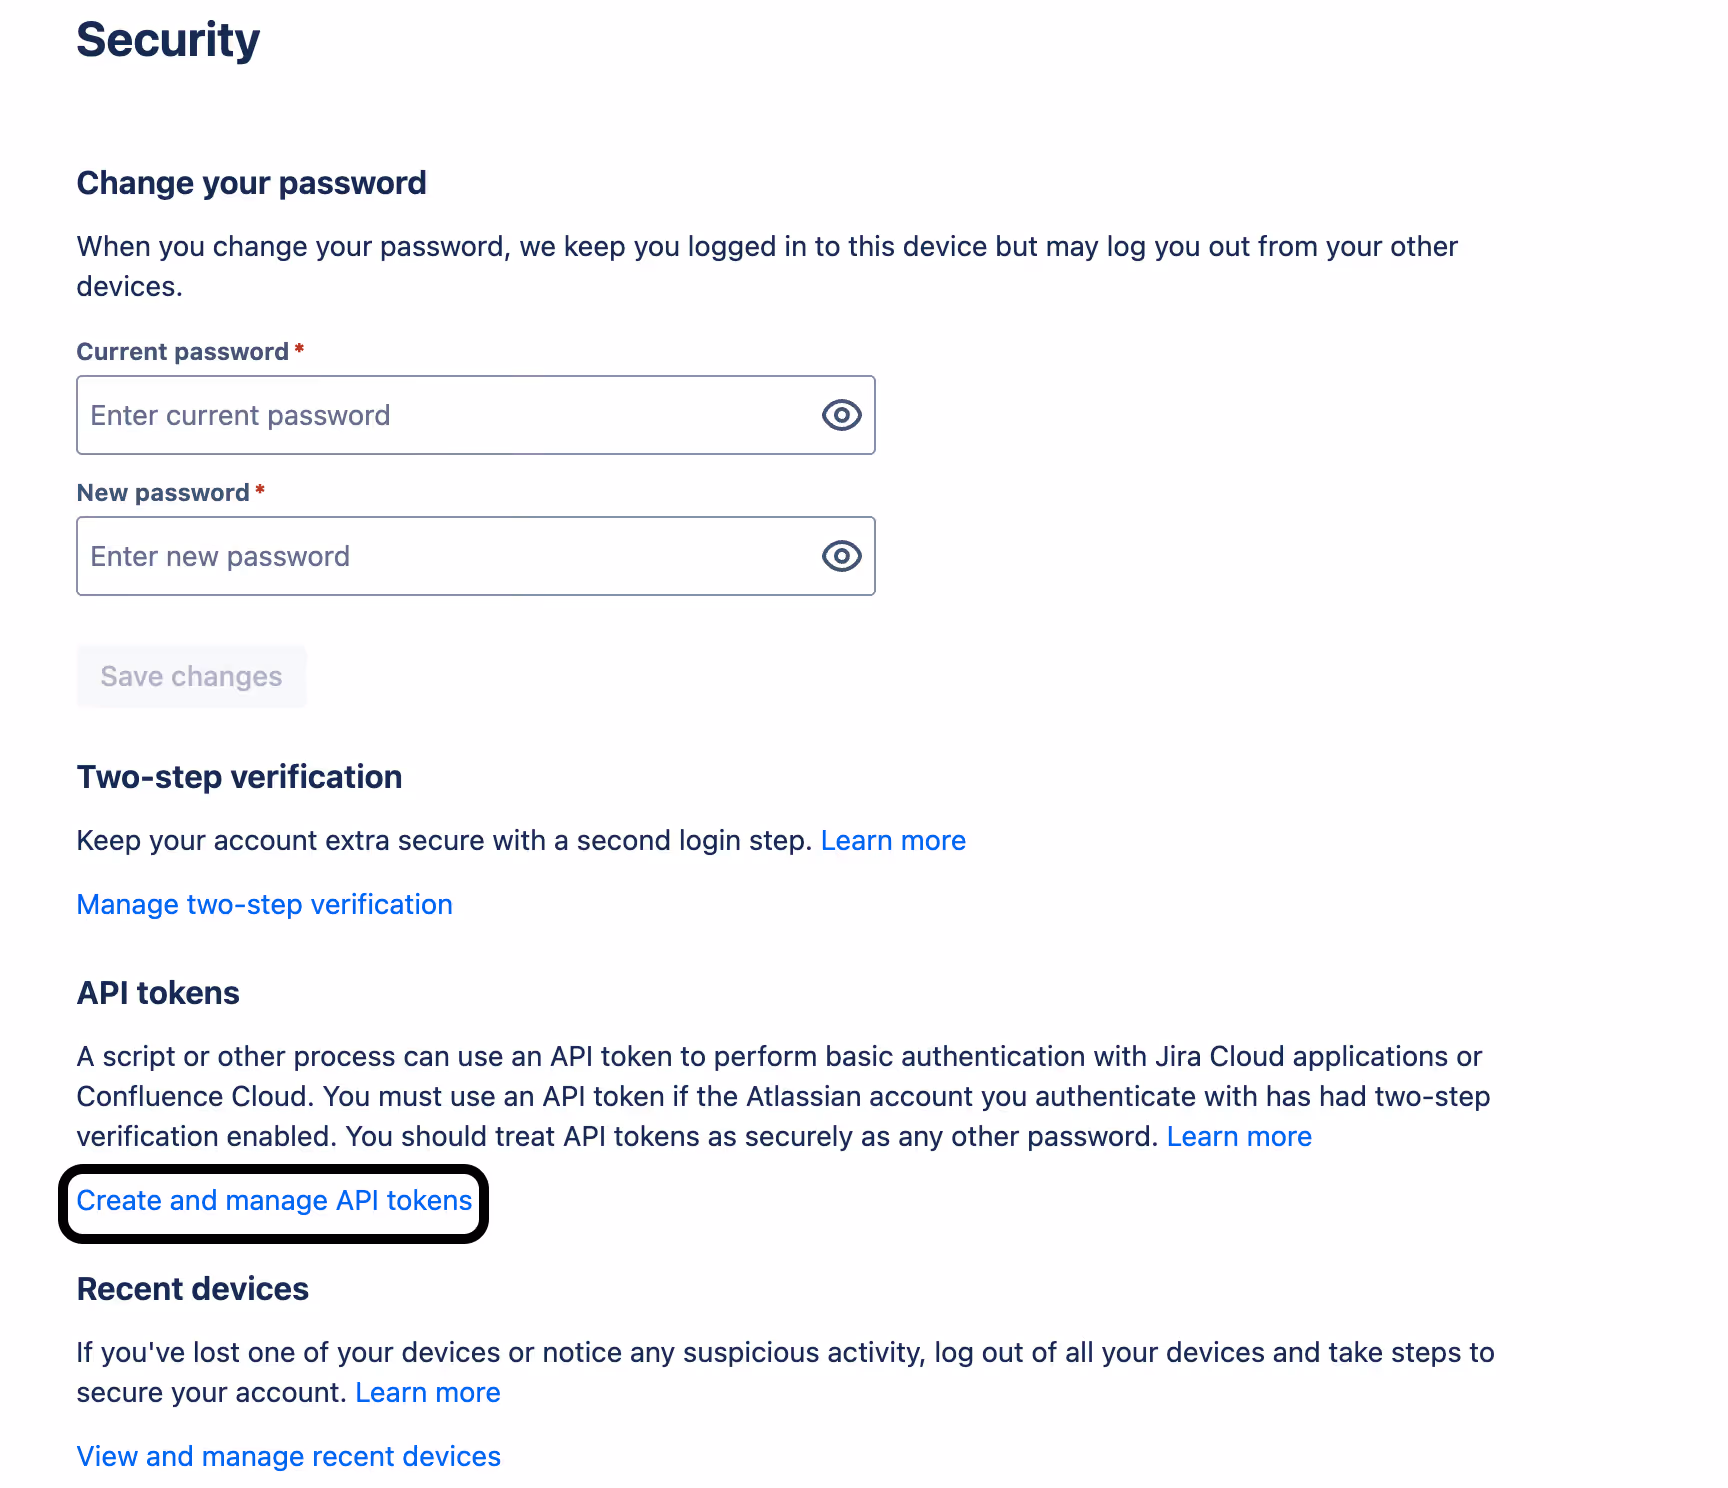
Select “Create and manage API tokens”
Under “API tokens,” you should see an option to create API tokens. Go ahead and click on this.
Verify your identity
API tokens can be used to access a wide range of sensitive information in Confluence, such as product roadmaps, sales slide decks, and even employees’ personally identifiable information (PII), like their home addresses.
Given the stakes involved, Atlassian takes an extra precaution to ensure that those who create API tokens are authorized to do so by automatically verifying their identities.
Atlassian will send you an 8-digit verification code via email, which you’ll need to enter into the verification screen below to proceed.

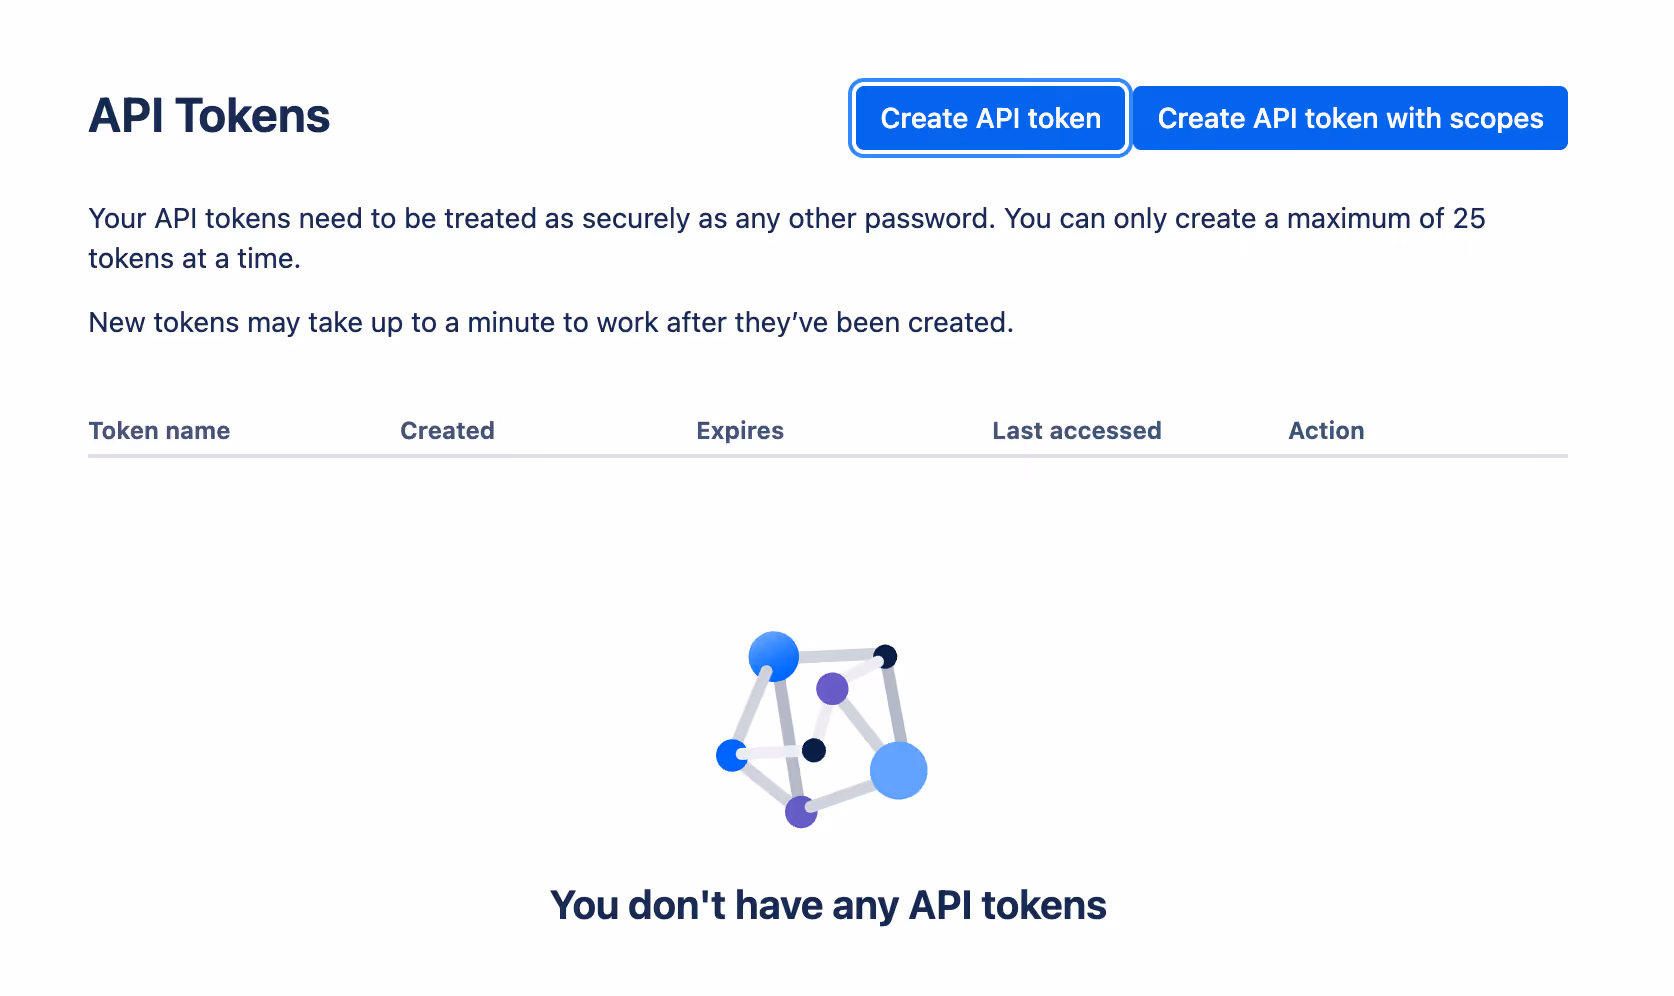
Create an API token with or without scopes
You now have two options: You can create an API token with full access (matching your user permissions), or you can create an API token with scopes, which lets you put additional limits on the data that’s available through the token.
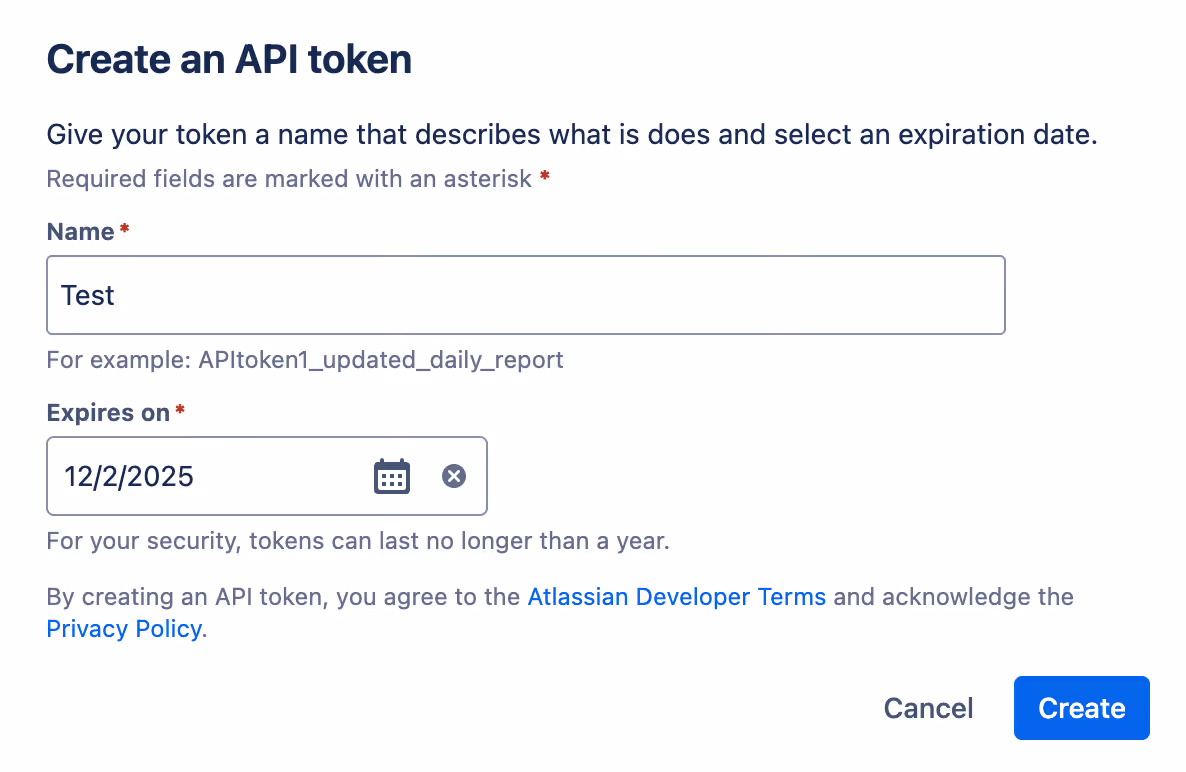
Assuming you decide to create a full access token, you’d go on to give it a name as well as assign it an expiration date before selecting “Create.”
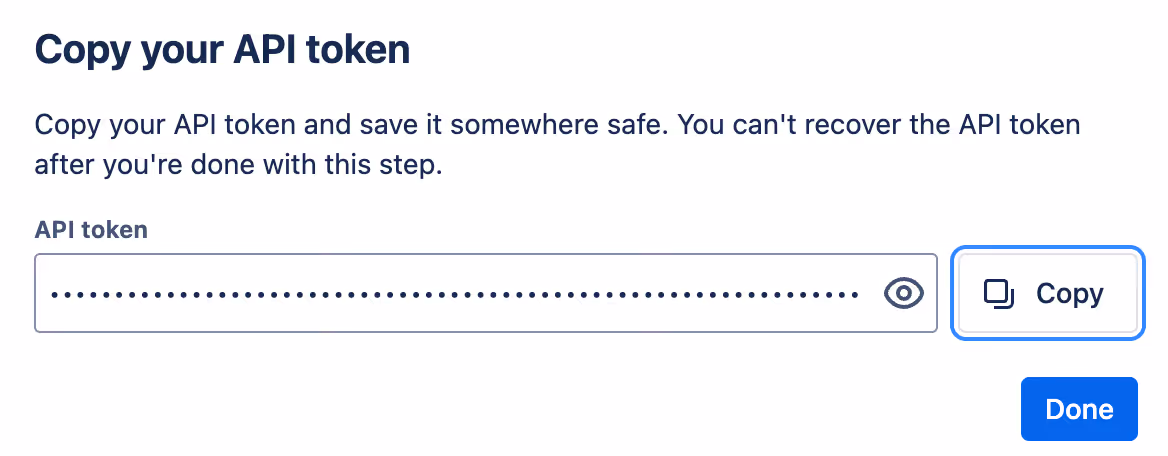
From there, your token will be automatically generated. You can simply copy it and store it in a safe location to prevent malicious actors from accessing and using it.
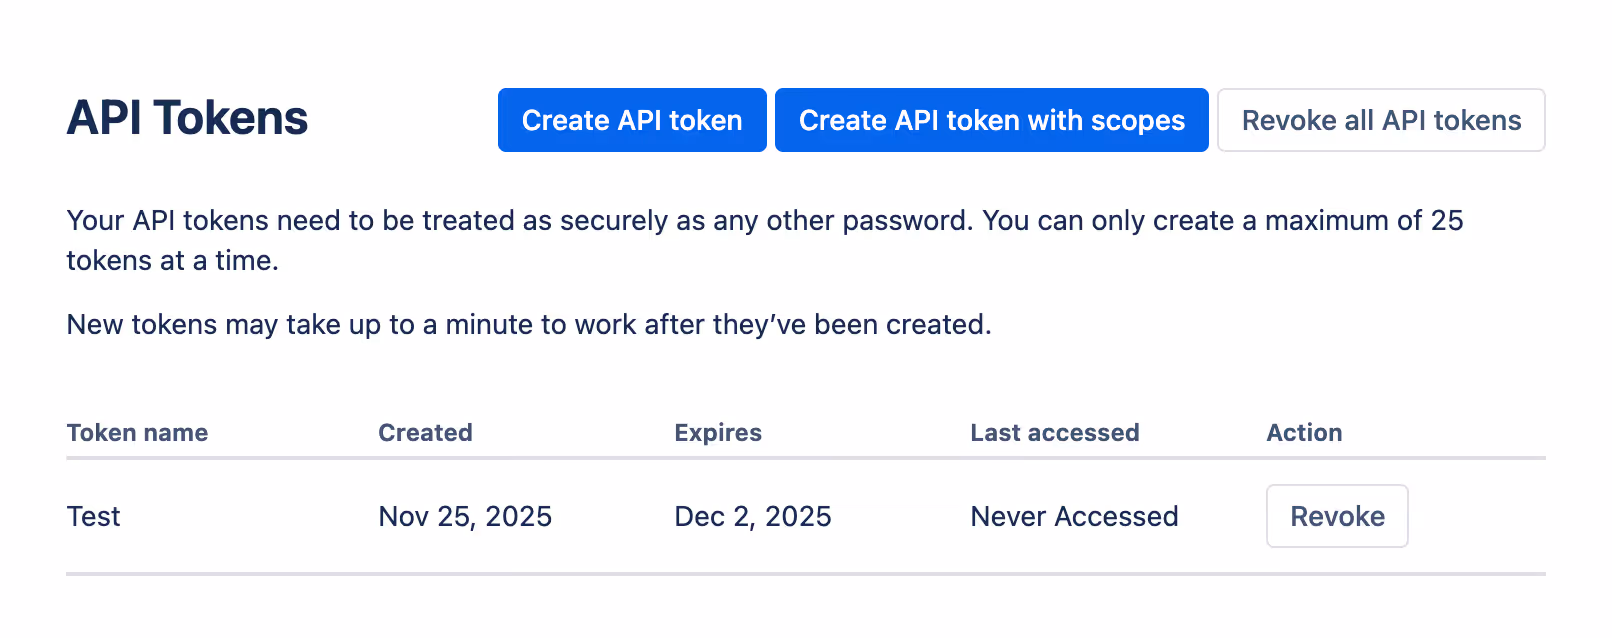
You’ll also see the token generated in your API tokens page. You can review its high level information (i.e., name, created and expiration dates, and when it was last accessed), and you can go on to revoke it whenever you’d like with the click of a button.
Other considerations for building to the Confluence API
Before integrating with Confluence’s API, it’s worth considering other items:
Pricing
Confluence offers a freemium pricing model with 4 plans: “Free”, “Standard”, “Premium”, and “Enterprise.”
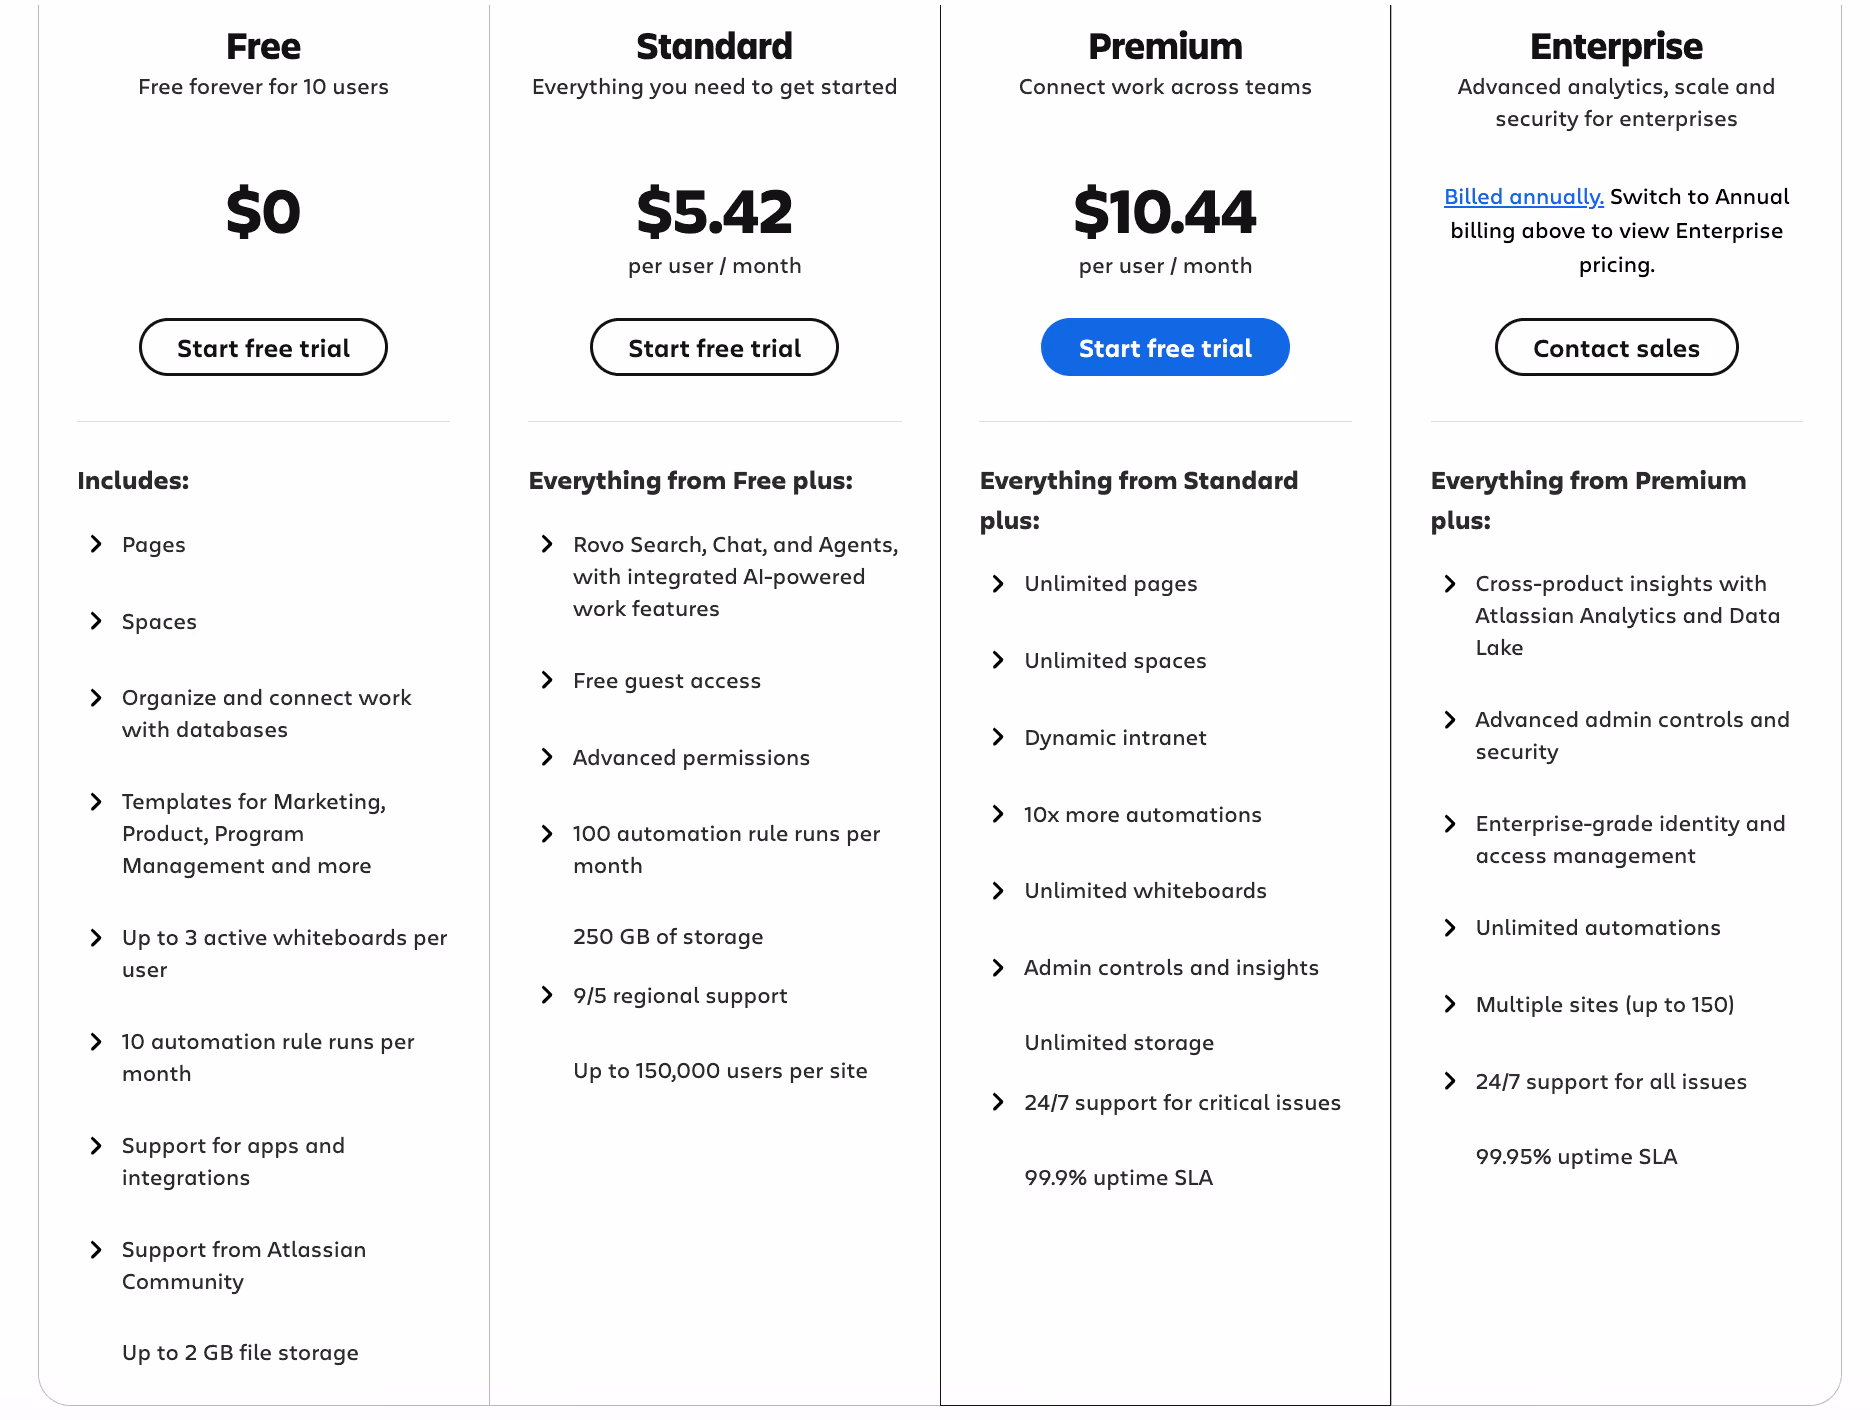
As you move up these plans, you’ll get access to more pages, spaces, automations, admin controls (like role-based access), and better support. You’ll even have a higher uptime SLA with their enterprise plan compared to any other plan (e.g., 99.95% compared to 99.9% in their Premium plan).
Learn more about Confluence’s pricing.
Rate Limits
Confluence uses two rate limit windows: A “burst” window, which limits the amount of requests that can be made every 10 seconds, and a “quota” window, which limits the number of requests that can occur every hour.
Confluence doesn’t share many details beyond this, but as you make API requests you’ll learn how many you can make from their response headers.
More specifically, Confluence will return numbers in the <code class="blog_inline-code">X-RateLimit-Remaining</code> and <code class="blog_inline-code">X-RateLimit-Reset</code> to help you understand how many API requests you can make within a burst or quota window. You can use this information to make future requests successfully.
Learn more about Confluence’s approach to enforcing rate limits.
Errors to look out for
Confluence uses standard API response codes, so you’ll likely run into the following error codes over time:
- 400 Invalid request: Your request wasn’t formatted correctly, whether you had invalid JSON, missing fields, and/or bad parameters
- 401 Not permitted: Your API request either didn’t include an API token or the token didn’t have the level of permissions required to perform the request
- 404 Not found: The resource either doesn’t exist or you don’t have the proper scopes to access it
- 429 Too many requests: You’ve exceeded Confluence’s rate limit in a given window (this can apply to their bust or quota windows)
- 500 Internal server error: There’s an issue with Confluence’s server—not your request
Final thoughts
The process of integrating Confluence with your product, along with other knowledge base systems (e.g., Notion), can take your engineers hundreds of hours, and countless more time for ongoing maintenance.
To help you add secure and reliable knowledge base integrations to your product quickly and successfully, you can leverage Merge’s Knowledge Base Unified API.
Learn more about the API, and Merge’s platform more broadly, by scheduling a demo with one of our integration experts!