
Table of contents
Just for you
How to build API integrations in Python


An API integration is the process of connecting two or more applications using an API and letting them share data and functionality with each other. This can help improve the functionality of applications, create new applications, and automate tasks. It's an especially valuable tool for companies, helping them save time and money, boost efficiency, and deliver a better user experience.
Python, with its rich set of libraries and frameworks, provides powerful tools for API integration across various domains, such as web services, databases, and cloud platforms. That's why, in this tutorial, you'll learn how to integrate APIs into your Python workflow. You'll build a functional application using Django that seamlessly interacts with the Recruitee applicant tracking system (ATS) API, showcasing both data retrieval and creation functionalities.
Related: A guide to performing API integration in JavaScript
Performing API integration in Python
To work with the Recruitee ATS API, you need to create a free account. Once you've successfully created an account, navigate to the Recruitee dashboard:
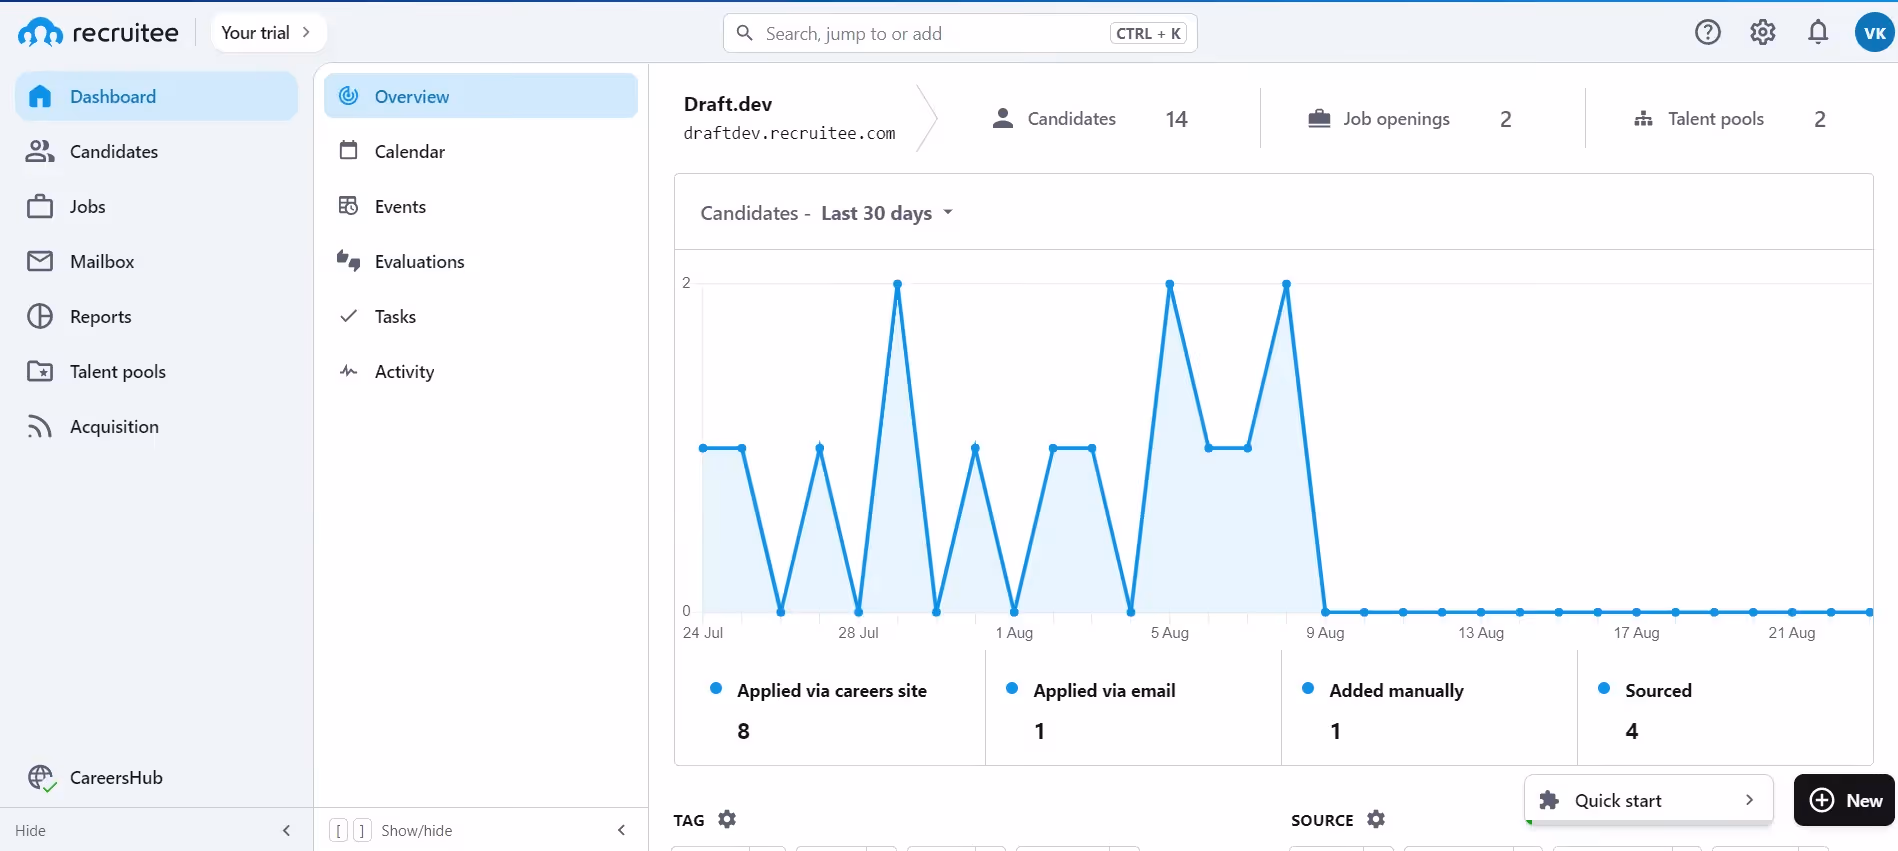
The Recruitee dashboard is your hub for all applicant-tracking tasks, from managing candidates to viewing hiring process reports. You can also integrate it with other recruiting tools, such as your ATS or customer relationship management (CRM) app. But what's really cool is that Recruitee offers an API, allowing you to seamlessly connect it with your own applications.
There's comprehensive API documentation that can help you understand and test all the API endpoints Recruitee offers. In this tutorial, we'll focus on the candidate retrieval and creation endpoints.
Obtain an authorization token for the Recruitee API
To begin using the Recruitee API, you need to acquire your API token from your Recruitee account. These tokens serve as the key to authorization for your API requests.
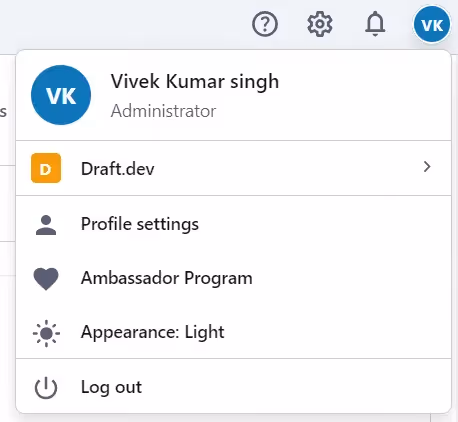
To get your token, click on your account avatar in the top-right corner of the Recruitee Dashboard and then navigate to Profile settings:
Within the Profile settings, locate the APPS AND PLUGINS section. Click on Personal API tokens, and a new page will appear:
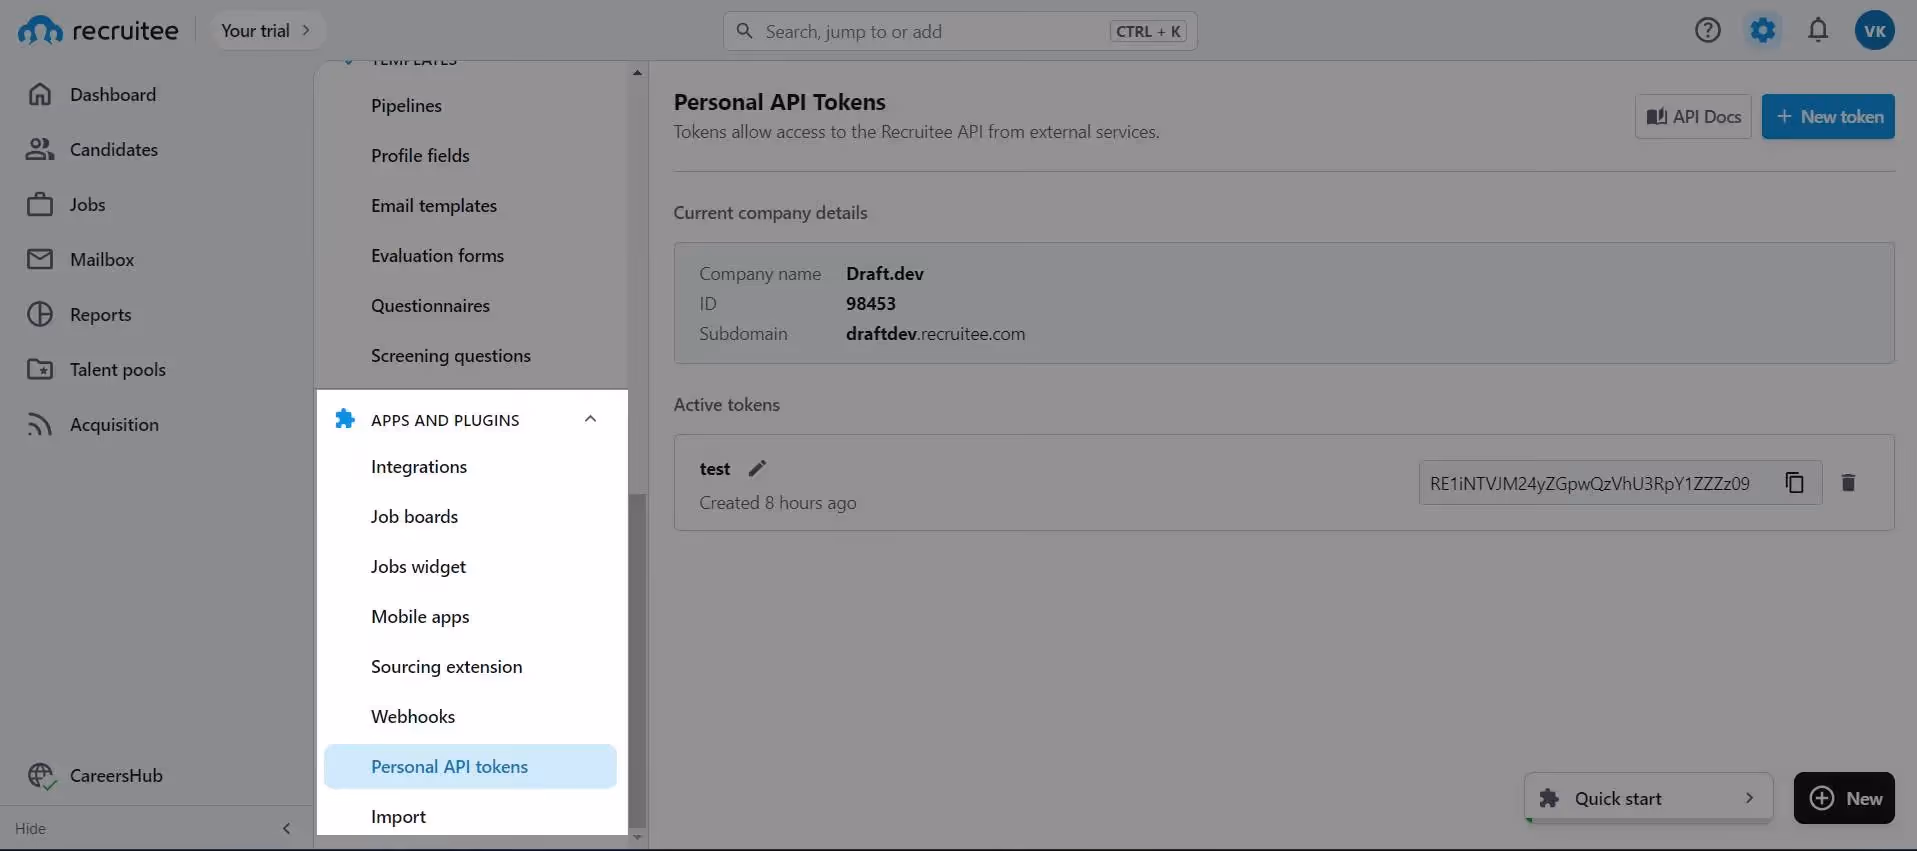
Click the New token button to generate a fresh API token. You'll be prompted to name the token—this name can be anything you want it to be. Additionally, you'll need to provide your account password to finalize the token creation.
While you're on this page, make sure you copy the Company ID associated with your account. You'll need this when you're interacting with various API endpoints.
Related: A guide to running API integration tests
Set up a new Django project
Django is a popular Python web framework we'll use to demonstrate API integration. To set up a new project, clone the starter template of this GitHub repository using the following command: <code class="blog_inline-code">git clone https://github.com/vivekthedev/api-integration-example.git -b starter</code>.
The starter template is already set up with a new project that contains an app called ats. This app is configured with boilerplate home page templates and URLs. The app also comes configured with the necessary settings to start working with the application.
After successfully cloning the repository, navigate to the starter project path in your terminal and execute the following command to set up a Python virtual environment:<code class="blog_inline-code">python -m venv env</code>
This command establishes a dedicated Python virtual environment specifically for this project. This isolation helps in managing dependencies without conflicts with global modules.
Activate the virtual environment using the following command: <code class="blog_inline-code">source env/bin/activate</code>
Then proceed to install the project-specific dependencies using this command:<code class="blog_inline-code">pip install -r requirements.txt</code>
After all the required dependencies are installed, you can launch the Django server to visualize your project's current state: <code class="blog_inline-code">python manage.py runserver</code>
Open your web browser and visit https://localhost:8000 to see your current Django app:
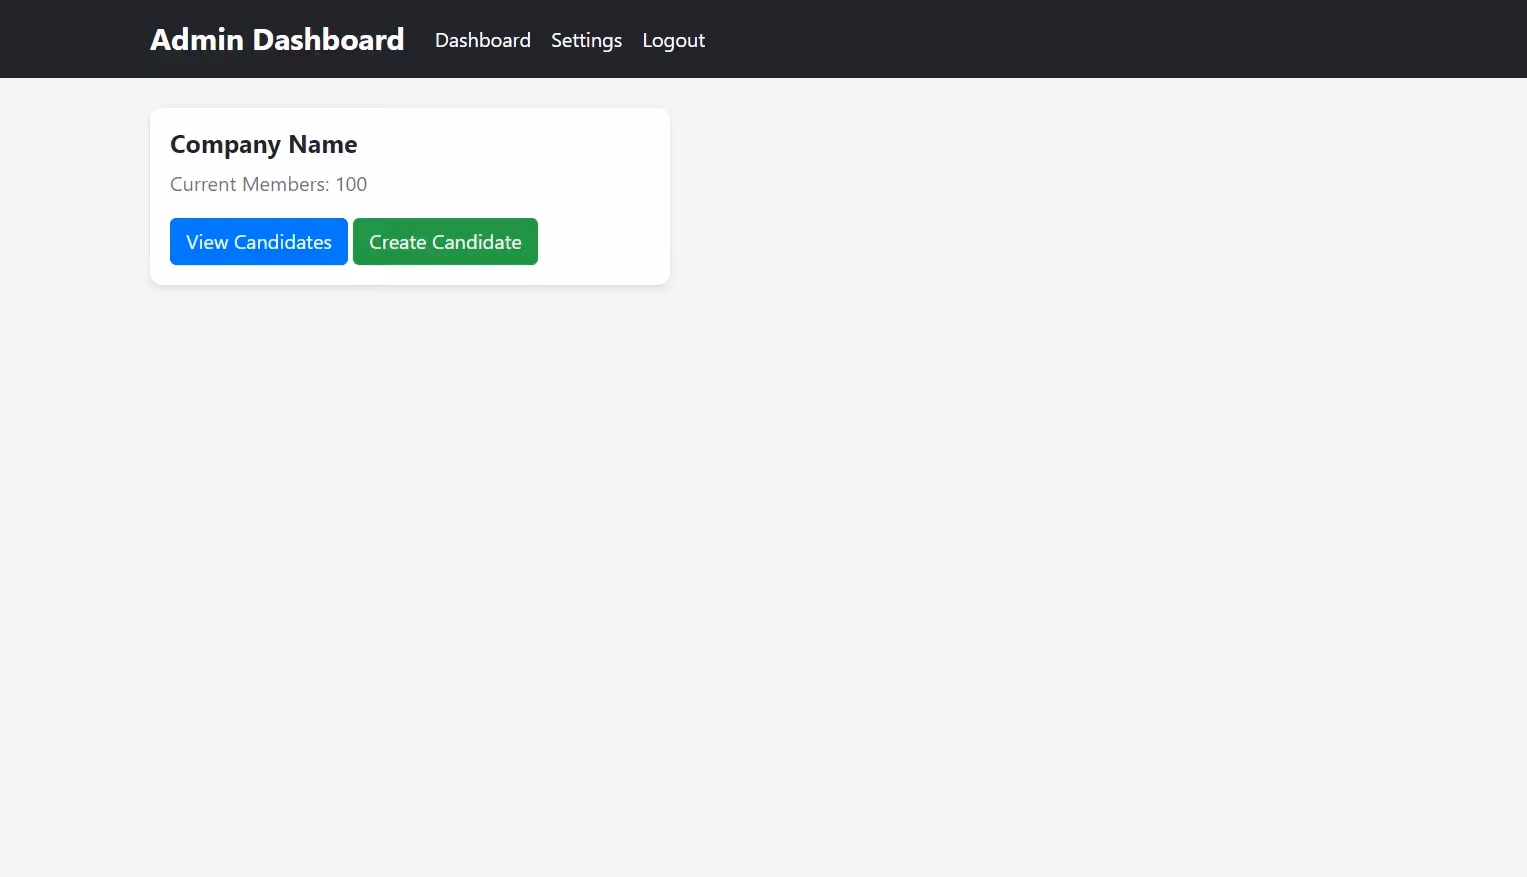
The initial version of this app includes placeholder links that will soon be made functional using the Recruitee ATS API.
Next, locate the ENV file within the project directory and open it. This file contains the following content:
RECRUITEE_COMPANY_ID=
RECRUITEE_API_KEY=""
DJANGO_SECRET_KEY="f26!+lia(%7ercu+d$&i9j41xz!w#-8i5+xt^&3+!q(dh8nphn"
Modify the contents of the ENV file by inserting your specific company ID and API key, which you previously obtained from Recruitee. Once you've made these necessary modifications, save the file.
Now, you're ready to create a new Django page designed to showcase candidate information.
Related: Our research on API integration issues
Retrieve data using the Recruitee API
In order to begin querying the Recruitee API, you need to create a new view inside your Django project. Open the ats/views.py file and import the following modules:
from collections import namedtuple
from django.contrib import messages
from django.conf import settings
import requests
import json
These modules play distinct roles in the interaction with the Recruitee API. The json module is crucial for capturing and interpreting API responses, efficiently converting raw data into a structured format within your application. The requests module establishes a communication channel with the Recruitee API. This module enables sending requests to API endpoints, retrieving data, and transmitting information effectively.
Additionally, the settings module is used for accessing authentication parameters like API_KEY and COMPANY_ID, and is securely stored in your project's settings. For streamlined extraction of relevant attributes from API responses, you'll use the namedtuple data structure. It simplifies labeling and accessing specific API output elements.
After importing the necessary modules in the views.py file, you need to set up some module-level variables that can be accessed by every view function in the views.py file. Add the following code immediately after the import statements:
The variable Candidate is designated as a module-level entity to extend its accessibility to all views tasked with retrieving candidate data. This variable has attributes such as name, emails, phones, avatar, created_at, and referrer. This design ensures a standardized representation of candidate-related information across various view functions.
Likewise, the variable BASE_URL serves a similar purpose. View functions can extend the BASE_URL to enable distinct requests to be directed to various endpoints. Note that the integration of the RECRUITEE_COMPANY_ID variable from the settings file directly into the URL is required by the Recruitee API. This is how the Recruitee backend recognizes the company from which the data is to be extracted.
The headers variable encapsulates the necessary metadata for API communication. The accept header specifies that the desired response format is JSON. The authorization header validates the authenticity of API requests. The Content-Type header is set to application/json, indicating that the content being sent or received is in JSON format. This facilitates proper data parsing and processing.
After setting up the previous variable, your project is ready to query Recruitee API and retrieve candidate data. To achieve this, you have to write code for the all_cadidates view. In the same views.py file, you'll find a function with the name all_candidate. Add the following code to the function:
In this code, a list named candidates is initialized, intended to store distinct candidate records. This list serves as the foundation for data aggregation to be further utilized as context data within a Django template for rendering in HTML. The variable URL extends the core BASE_URL to encompass the specific candidates/ endpoint. Querying this endpoint returns candidate data as a response.
Through the utilization of an HTTP GET request, the API call is executed using the constructed URL. The resulting information is captured within the response variable for further processing. Note the inclusion of the headers variable within the request headers to ensure proper authentication on the Recruitee servers. Upon obtaining the response, the subsequent task converts the JSON-formatted plaintext response into a structured Python dictionary variable named candidates_dict. This transformation is crucial for effective querying of the data.
Now, you need to parse the received response and send it to the Django template. To achieve this, update the following code in the same view:
In this code, an iterative loop is used to traverse the dictionary, extracting relevant attributes from each candidate entry. These attributes are then encapsulated within a tuple named cols. This tuple is used as input to the Candidate named tuple, resulting in the creation of a structured candidate record using the _make function, which accepts an iterable in order to initialize a labeled named tuple.
The accumulation of these named tuples, each representing a candidate within the candidates list, is then passed as context for rendering purposes within the designated Django template named retrieve_candidate.html.
In order to view the result of the view, you need to start the Django server using the following command: <code class="blog_inline-code">python manage.py runserver</code>
Open your browser and visit http://127.0.0.1:8000/candidates. You should see an output like this:
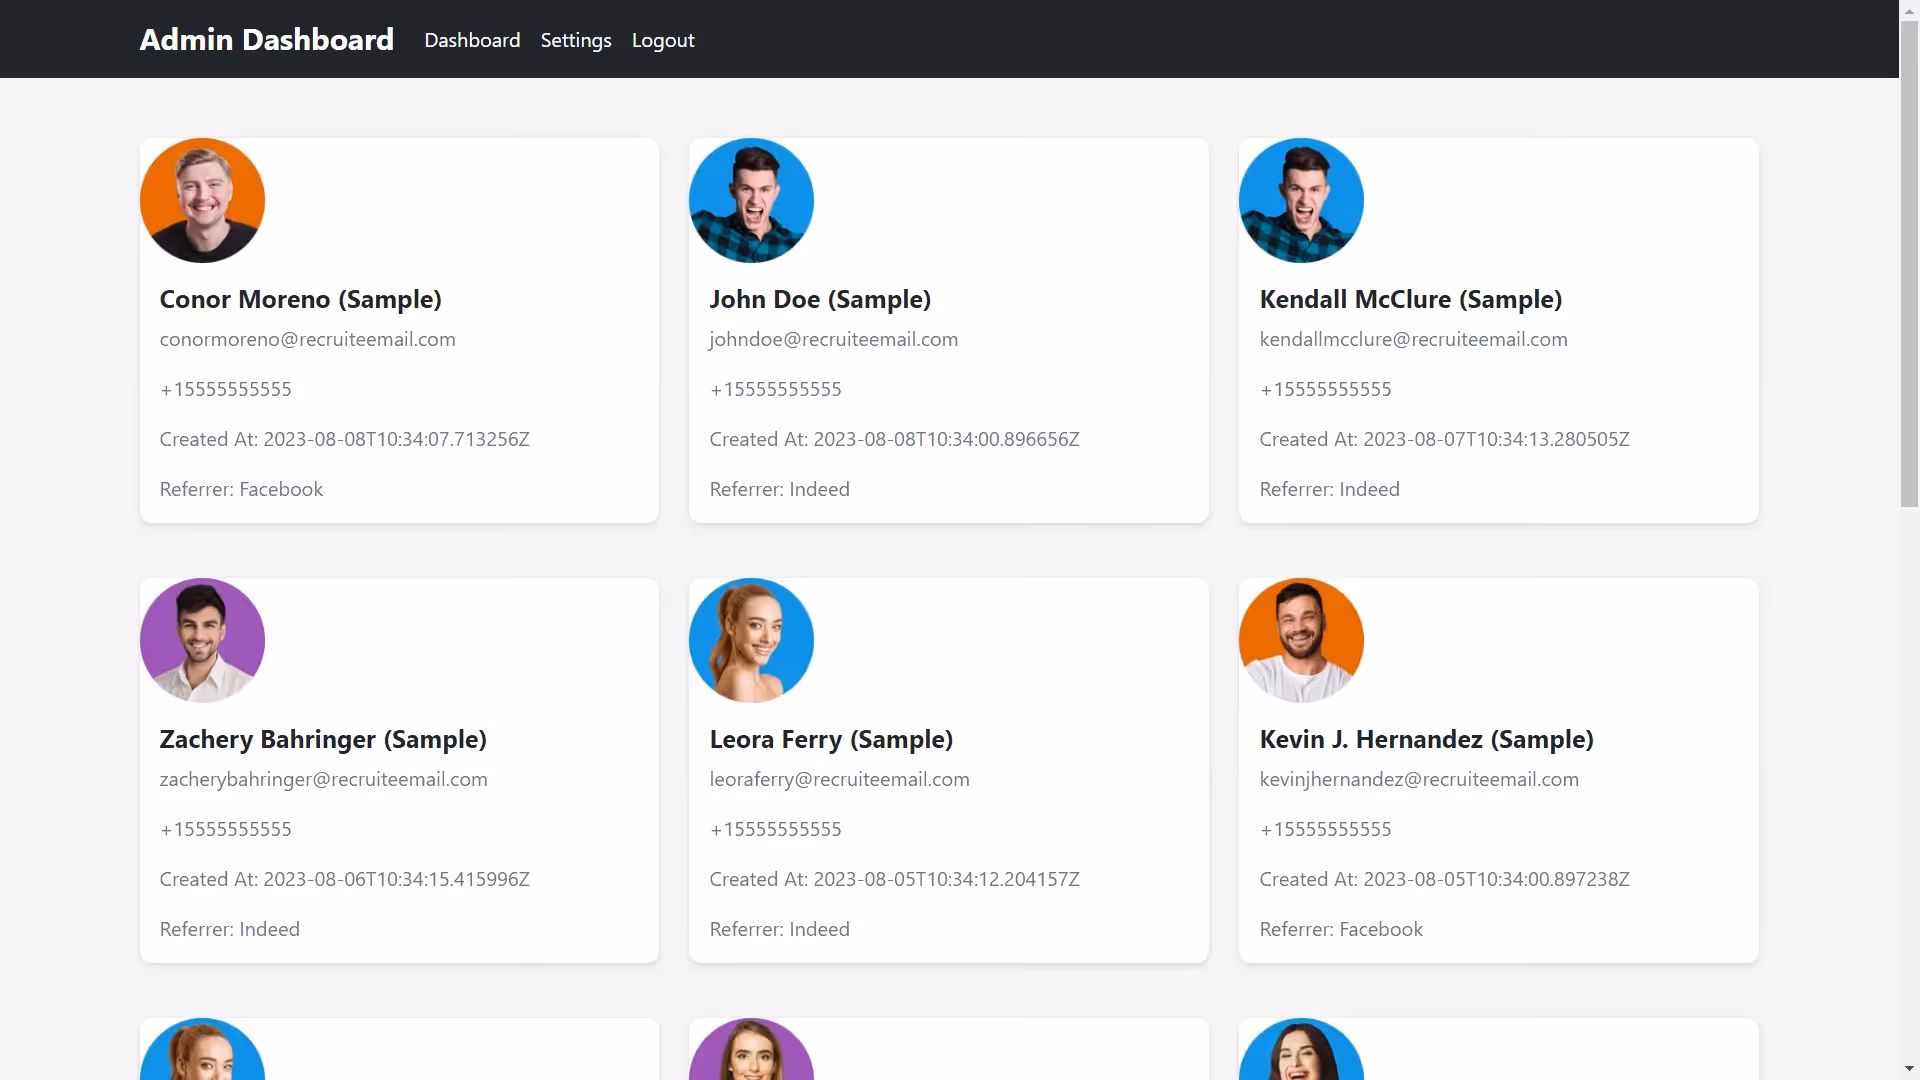
This demonstrates how the view fetched the API for candidates' data, parsed it into a dictionary, and displayed the results in the earlier HTML.
Related: An overview on the API integration process
Create data using the Recruitee API
The Recruitee ATS API also supports HTTP POST request functionality, which enables you to pass a payload to the server and create a new candidate record. In this section, you'll extend your application to add this functionality. To begin, open your ats/views.py file and extend the view new_candidate using the following code:
In this code snippet, the new_candidate view is defined to determine if the incoming request method is indeed a POST request. Django provides a straightforward means to retrieve this form data through the request.POST.get('keyname') method.
Within this context, the code constructs a dictionary called candidate_payload. This payload plays a crucial role as it will be sent to the Recruitee API in JSON format. The dictionary is populated with candidate data and formatted to meet the API's expectations. This sets the groundwork for interacting with the Recruitee API and creating new candidate records using the provided data.
Now, you need to send this data to the appropriate endpoint. Add the following code to the same view:
After the construction of the candidate_payload dictionary, the next step is to initiate an HTTP POST request to a specified URL. This URL is formed by concatenating the BASE_URL and candidates/. The request is executed using the requests.post() method, where the headers variable and candidate_payload are included as headers and JSON data, respectively.
Upon receiving the API response, the code checks its status code. If the status code equals 201, it signifies that the candidate creation was successful, leading to a notification message: "New candidate created successfully." Subsequently, the user is redirected to a /candidates page where all the candidates are shown.
However, in cases where the response status code does not equal 201, the code renders the create_candidate.html template, providing an opportunity for further action or correction. This systematic approach ensures a smooth and reliable interaction with the API, enhancing the user experience and application functionality.
In order to test this view, run the Django server using the following command: <code class="blog_inline-code">python manage.py runserver</code>
After running the server, visit http://127.0.0.1:8000/candidates/new, where you'll see a candidate form. Fill out the form using some dummy data:
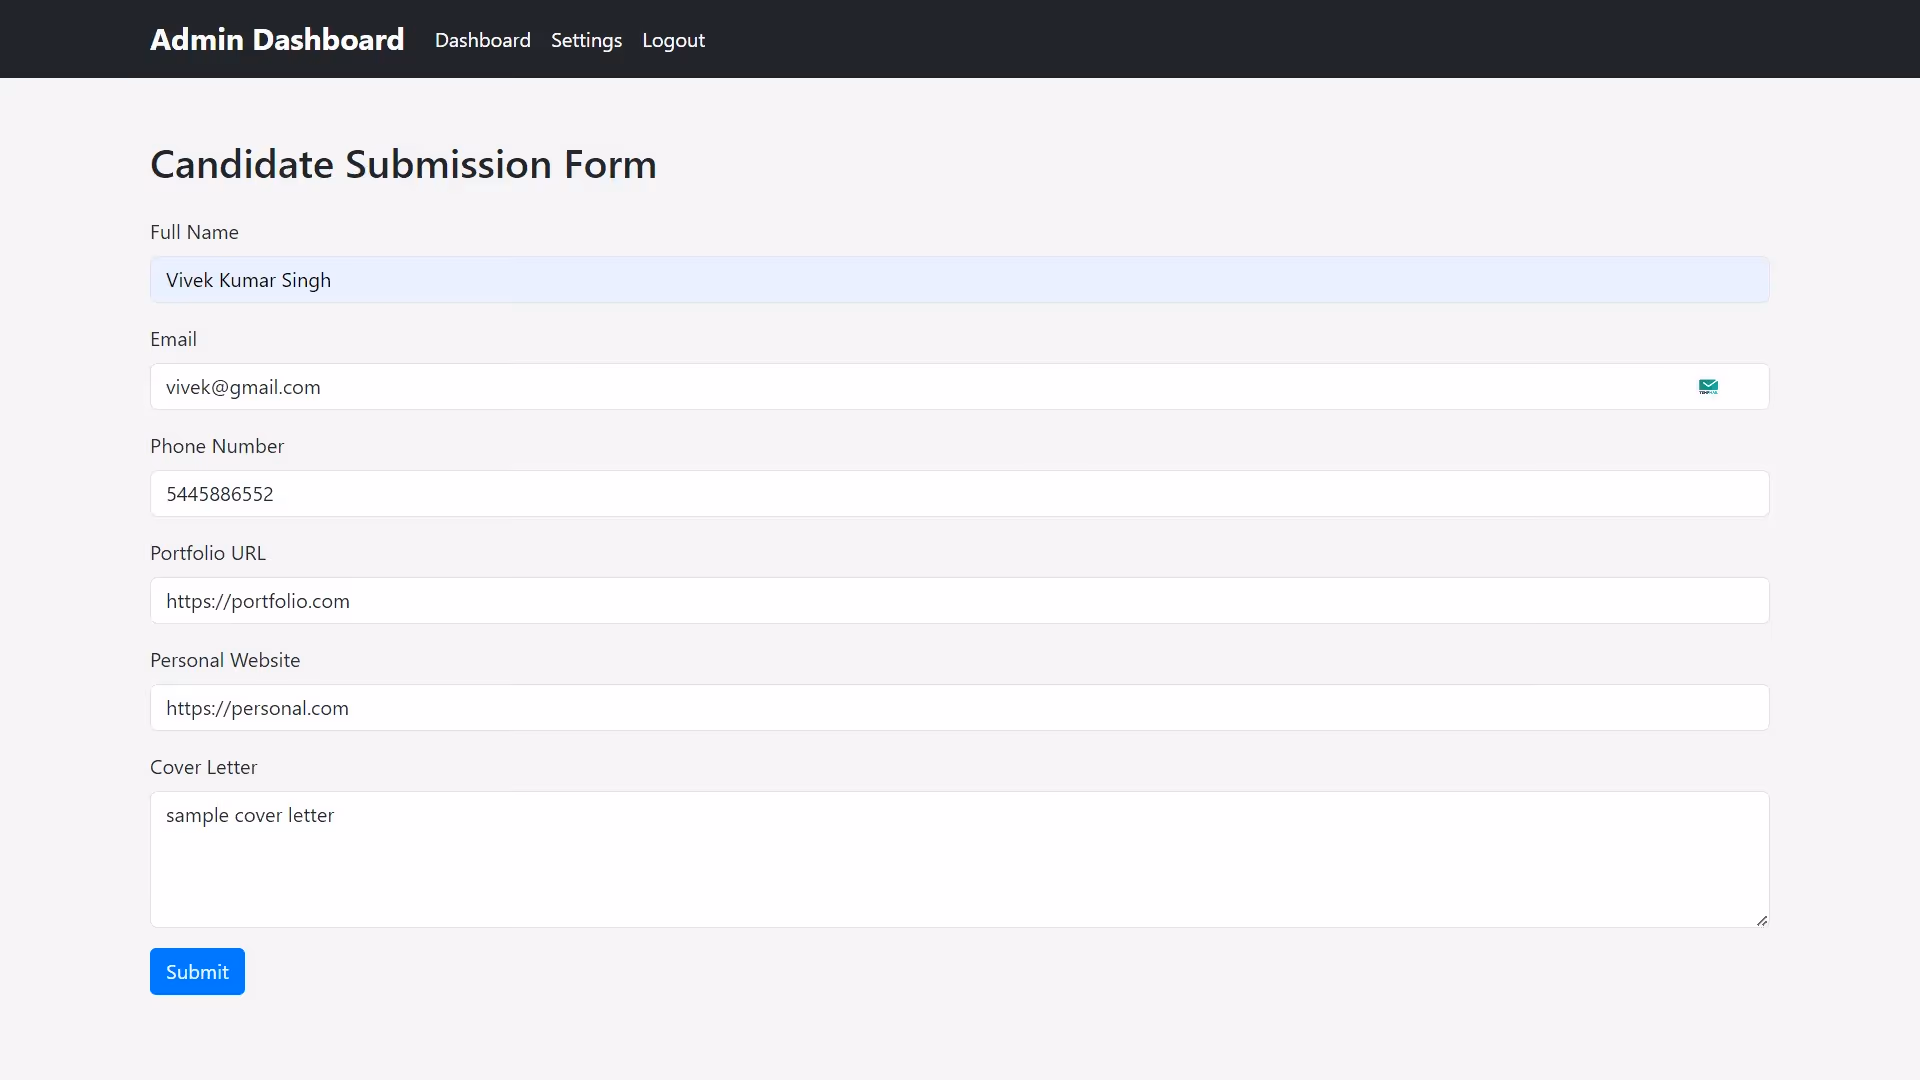
Click on Submit to send the form data to the API. After the request is executed, you'll see the following newly created candidate page:
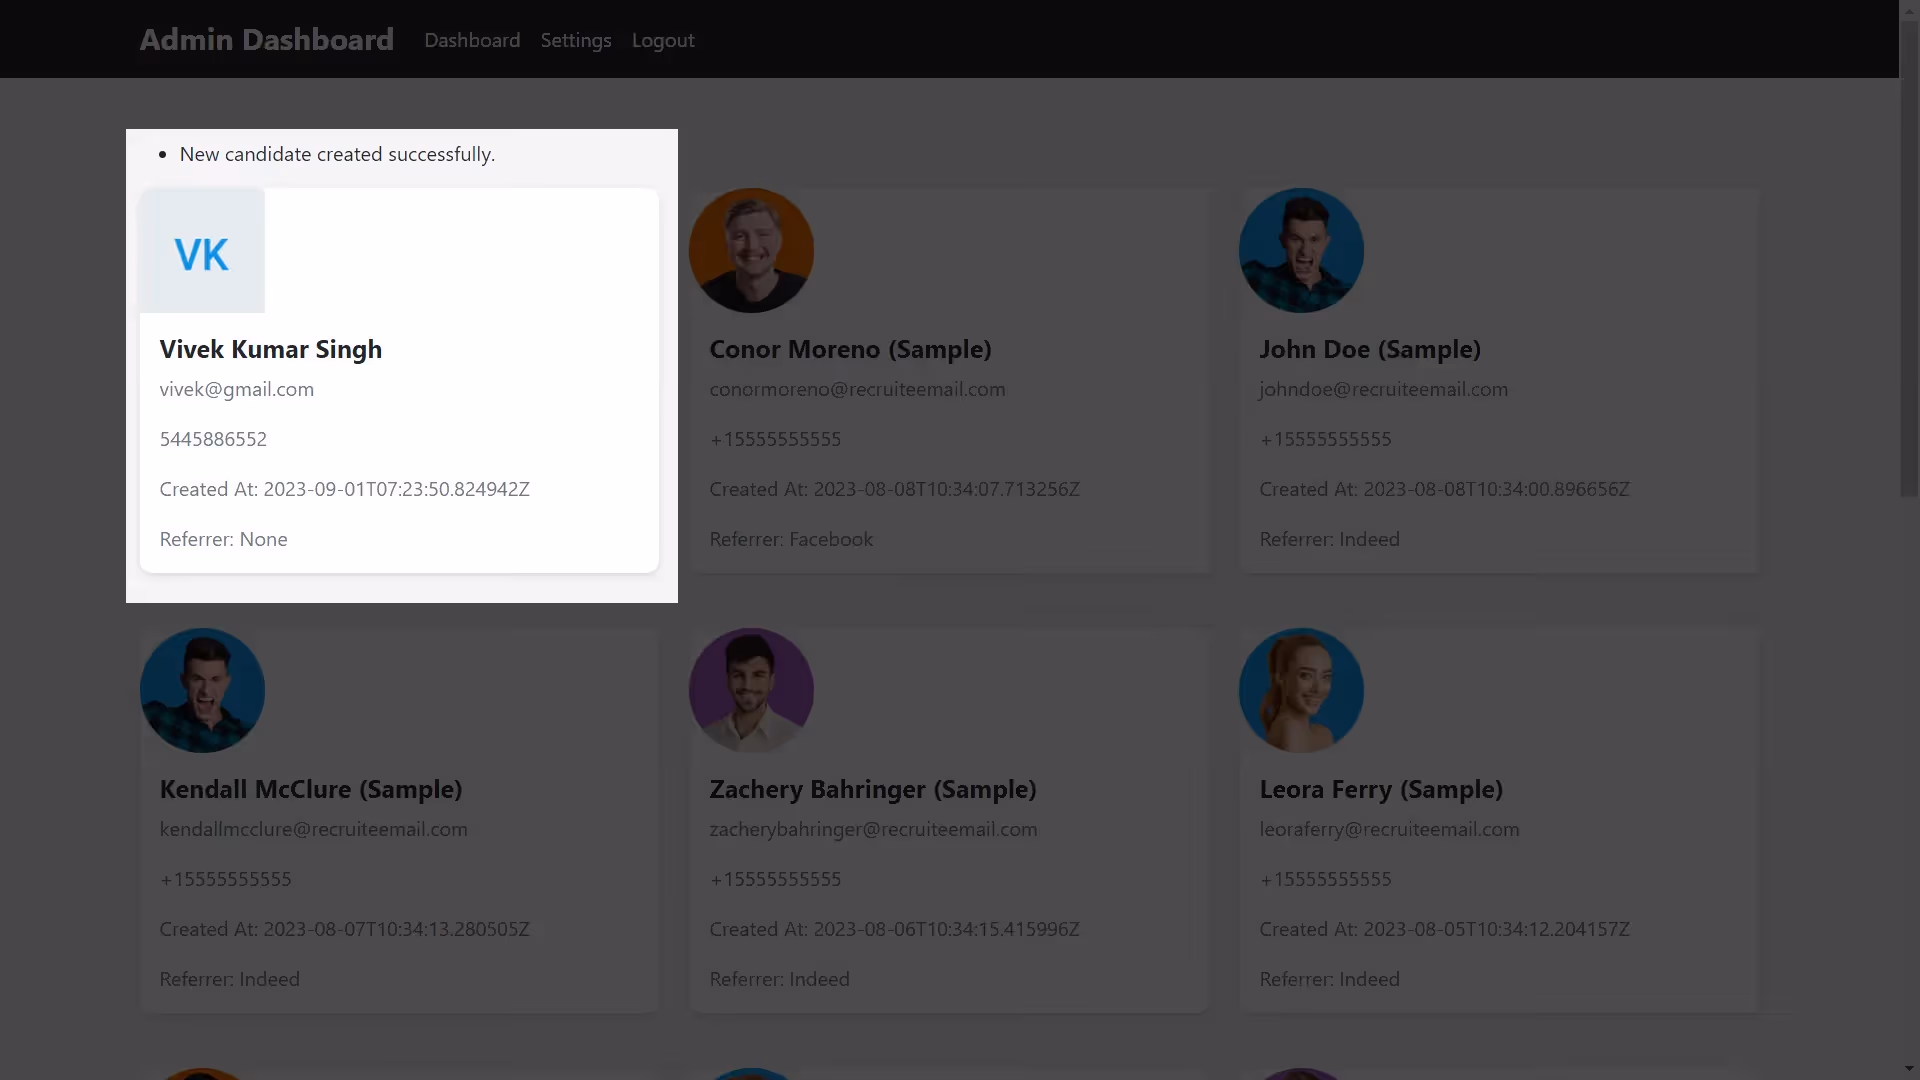
At this point, you have a fully functional API-integrated app that supports retrieving and creating data objects on the server.
You can also use the Recruitee API documentation to extend your app with new functionalities, like getting specific users or making changes to existing users.
Related: What is API integration management?
Final thoughts
Unfortunately, directly integrating APIs can be intricate, especially when juggling multiple APIs with varying authentication methods and details.
In addition, API integrations require consistent upkeep and adjustments as services evolve. You may also find having to build features like handling rate limiting as your integration continues to gain traction and onboard larger customers. To simplify this process at scale, you can leverage Merge, the leading unified API platform.
Simply build once to one of Merge's Unified APIs to access a whole category of integrations for your product, whether that's HRIS, ATS, CRM, file storage, marketing automation, accounting, or ticketing. Merge also provides a variety of Integration Management capabilities to ensure your customer-facing teams can easily track integration activities, identify errors, and pinpoint the solution to any error.
You can learn more about Merge by scheduling a demo with one of our integration experts.

.jpg)
.png)
.png)

