How to POST candidates using the BambooHR API in Python

BambooHR is a popular human resources information system (HRIS) that allows you to manage everything from recruitment to payroll through an easy-to-use interface.
The BambooHR API lets you programmatically access and manipulate HR data, which can be useful for tasks like posting jobs or candidates, syncing employee data with other systems, or automating HR processes.
For instance, you can use the BambooHR API to integrate with other platforms, such as applicant tracking systems (ATS), learning management systems (LMS), or custom in-house applications. This allows you to automatically transfer candidate information from an ATS to BambooHR once they are hired or to sync employee training records from an LMS with BambooHR to inform performance evaluations.
In this article, you'll learn how to programmatically POST candidates to BambooHR using Python—in other words, to add candidate details to your BambooHR platform directly through a Python script that can be integrated into your larger recruitment or HR management system.
Prerequisites
Before you start, ensure you have the following installed:
- Python 3.10 or newer.
- A text editor, such as Visual Studio Code.
- A BambooHR account. You can sign up for a free trial and use BambooHR's trial data for this tutorial.
You also need the requests library to make HTTP requests. You can install it from your terminal or shell using pip: <code class="blog_inline-code">pip3 install requests</code>
Generate an API key
BambooHR provides multiple authentication options, including OAuth and API keys. In this tutorial, you'll authenticate with an API key.
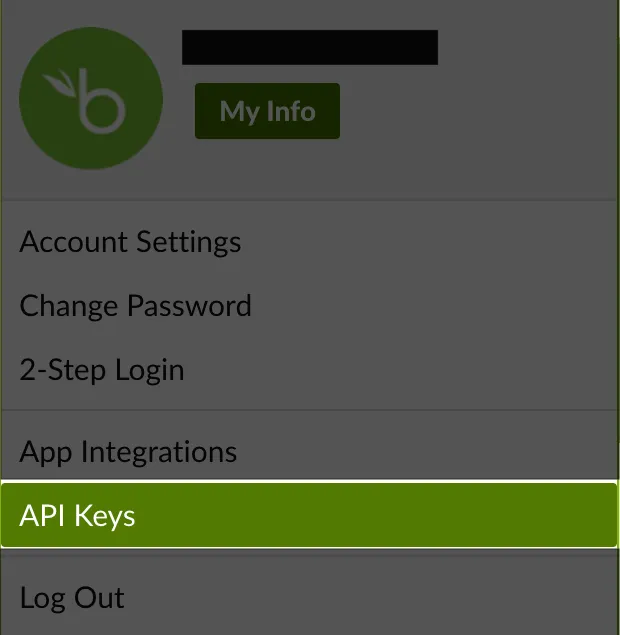
Sign into your BambooHR account and navigate to your profile by clicking on your profile icon in the upper-right corner. From the drop-down menu, select API Keys:

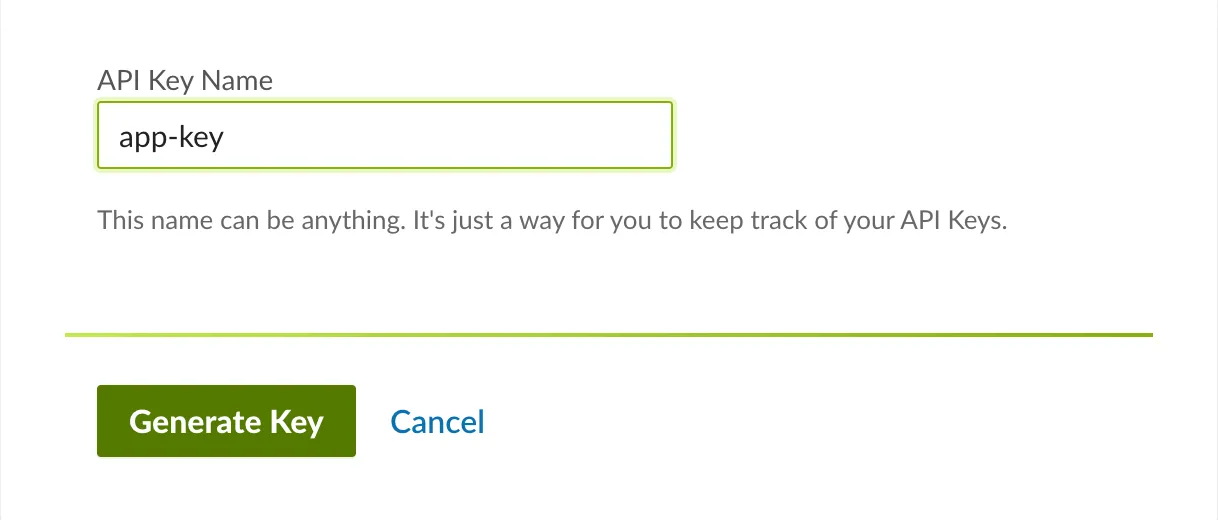
In the API Keys section, press Add New Key. Name your new API app-key and click Generate Key:

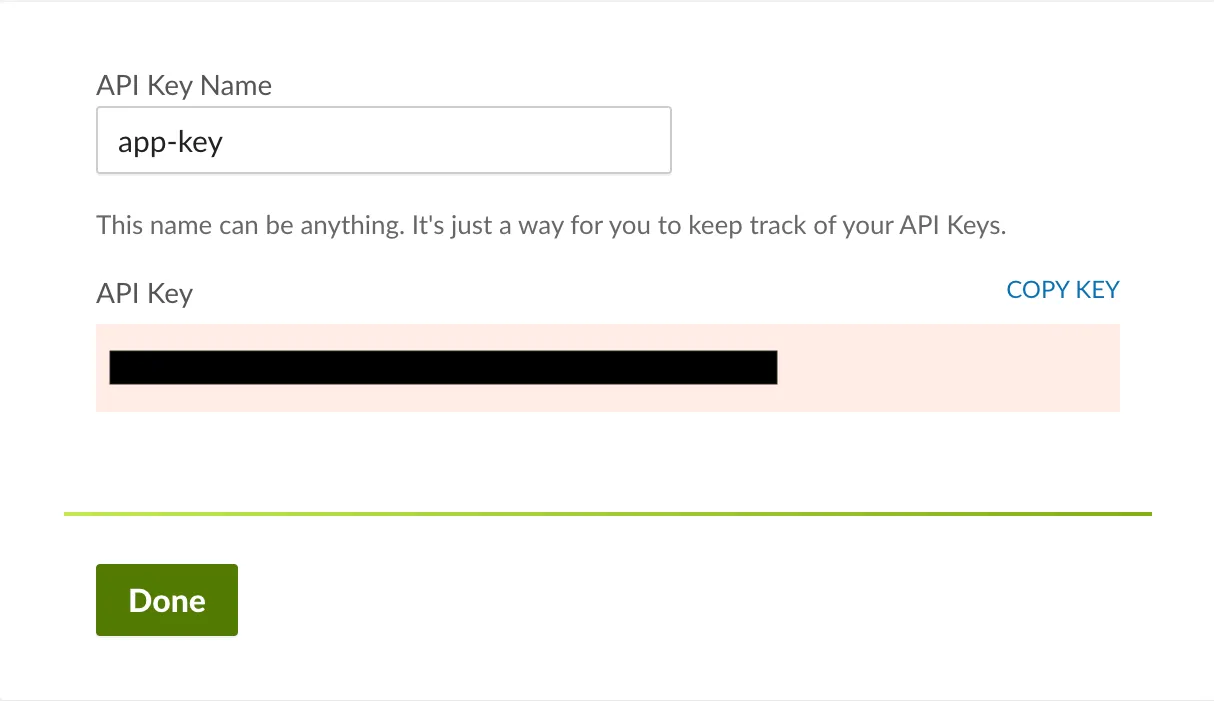
Once the key is generated, use the COPY KEY option to copy it to your clipboard:

Make sure to save your key in a secure location as you'll use it in your Python code later in this tutorial.
Close the key generation dialog by clicking Done.
Retrieve job listings from BambooHR
Before creating a candidate in BambooHR, you must know which job you're associating them with. Each job posting in BambooHR has a unique identifier called jobId. You need this jobId when posting a new candidate to link them to the job they're applying for.
Fetch the list of jobs
Make a GET request to the BambooHR API's jobs endpoint to get the list of jobs. Create a new Python file named get_bamboohr_jobs.py and add the following code to it:
This code begins by importing the requests library to make HTTP requests and the base64 library for encoding. It sets your BambooHR subdomain and API key, which are used to construct the request URL and authenticate your API request. The API key is encoded in Base64 format to comply with the Basic Auth header requirements.
It then defines the URL to fetch job listings from BambooHR's ATS and sets the necessary headers that include your encoded API key for authorization. It makes a GET request to the API, and if it's successful, it iterates over the jobs and prints out their IDs, titles, and other related details. If the request fails, it prints out the status code and response to troubleshoot the issue.
Note that the subdomain variable should be replaced with the unique subdomain assigned to your BambooHR account, which is the custom URL prefix that you use to access your BambooHR dashboard. For instance, if you access your account at https://companyname.bamboohr.com, then companyname is your subdomain.
Also, replace the api_key variable with the personal API key you generated earlier.
Run the script to get job IDs
Open your terminal or shell, navigate to the directory where your script is located, and run the following command: <code class="blog_inline-code">python3 get_bamboohr_jobs.py</code>
The output is a list of job IDs and their corresponding titles:
Job ID: 22, Job Title: {'id': None, 'label': 'Financial Analyst'}
Job ID: 21, Job Title: {'id': None, 'label': 'Marketing Manager'}
Job ID: 20, Job Title: {'id': None, 'label': 'Software Engineer'}
Job ID: 19, Job Title: {'id': None, 'label': 'General Application'}
Job ID: 18, Job Title: {'id': None, 'label': 'Videographer'}
Job ID: 15, Job Title: {'id': None, 'label': 'IT Security Engineer'}
Make a note of the job ID you want to use when posting candidates. For testing purposes, use Job ID: 22 for Financial Analyst.
Make a POST request using Python
Now that you have your job ID, you're ready to create your POST request.
Create a new Python file named post_bamboohr_candidates.py and add the following code to it:
This code uses requests to post candidate information to BambooHR's API. It encodes your API key using base64 to meet the Basic Auth requirements and includes it in the headers for authorization. The candidate_data dictionary holds the candidate's details, including the job ID you obtained in the previous step.
The requests.post call attempts to add the candidate to BambooHR. If the response is successful, a confirmation message is printed. If there's an error, the status code and reason are printed out to help you understand what went wrong. Any request issues, like network problems, are caught, and an error message is displayed.
Remember to replace the subdomain and api_key fields as before.
Run and test your code
To run your script, open your terminal or shell and navigate to the directory where your Python script is saved. Run the script by typing the following command: <code class="blog_inline-code">python3 post_bamboohr_candidates.py</code>
If the script runs successfully, you should see Candidate successfully posted to BambooHR. printed in your terminal or shell: <code class="blog_inline-code">Candidate successfully posted to BambooHR.</code>
Note that running your <code class="blog_inline-code">post_bamboohr_candidates.py</code> script associates the new candidate with the job posting you specified in the jobId.
If there's an error, the script prints the status code and the response from the API, which can help you troubleshoot the issue:
<code class="blog_inline-code">Failed to post candidate. Status code: XXX
Response: {detailed error message from the API}</code>
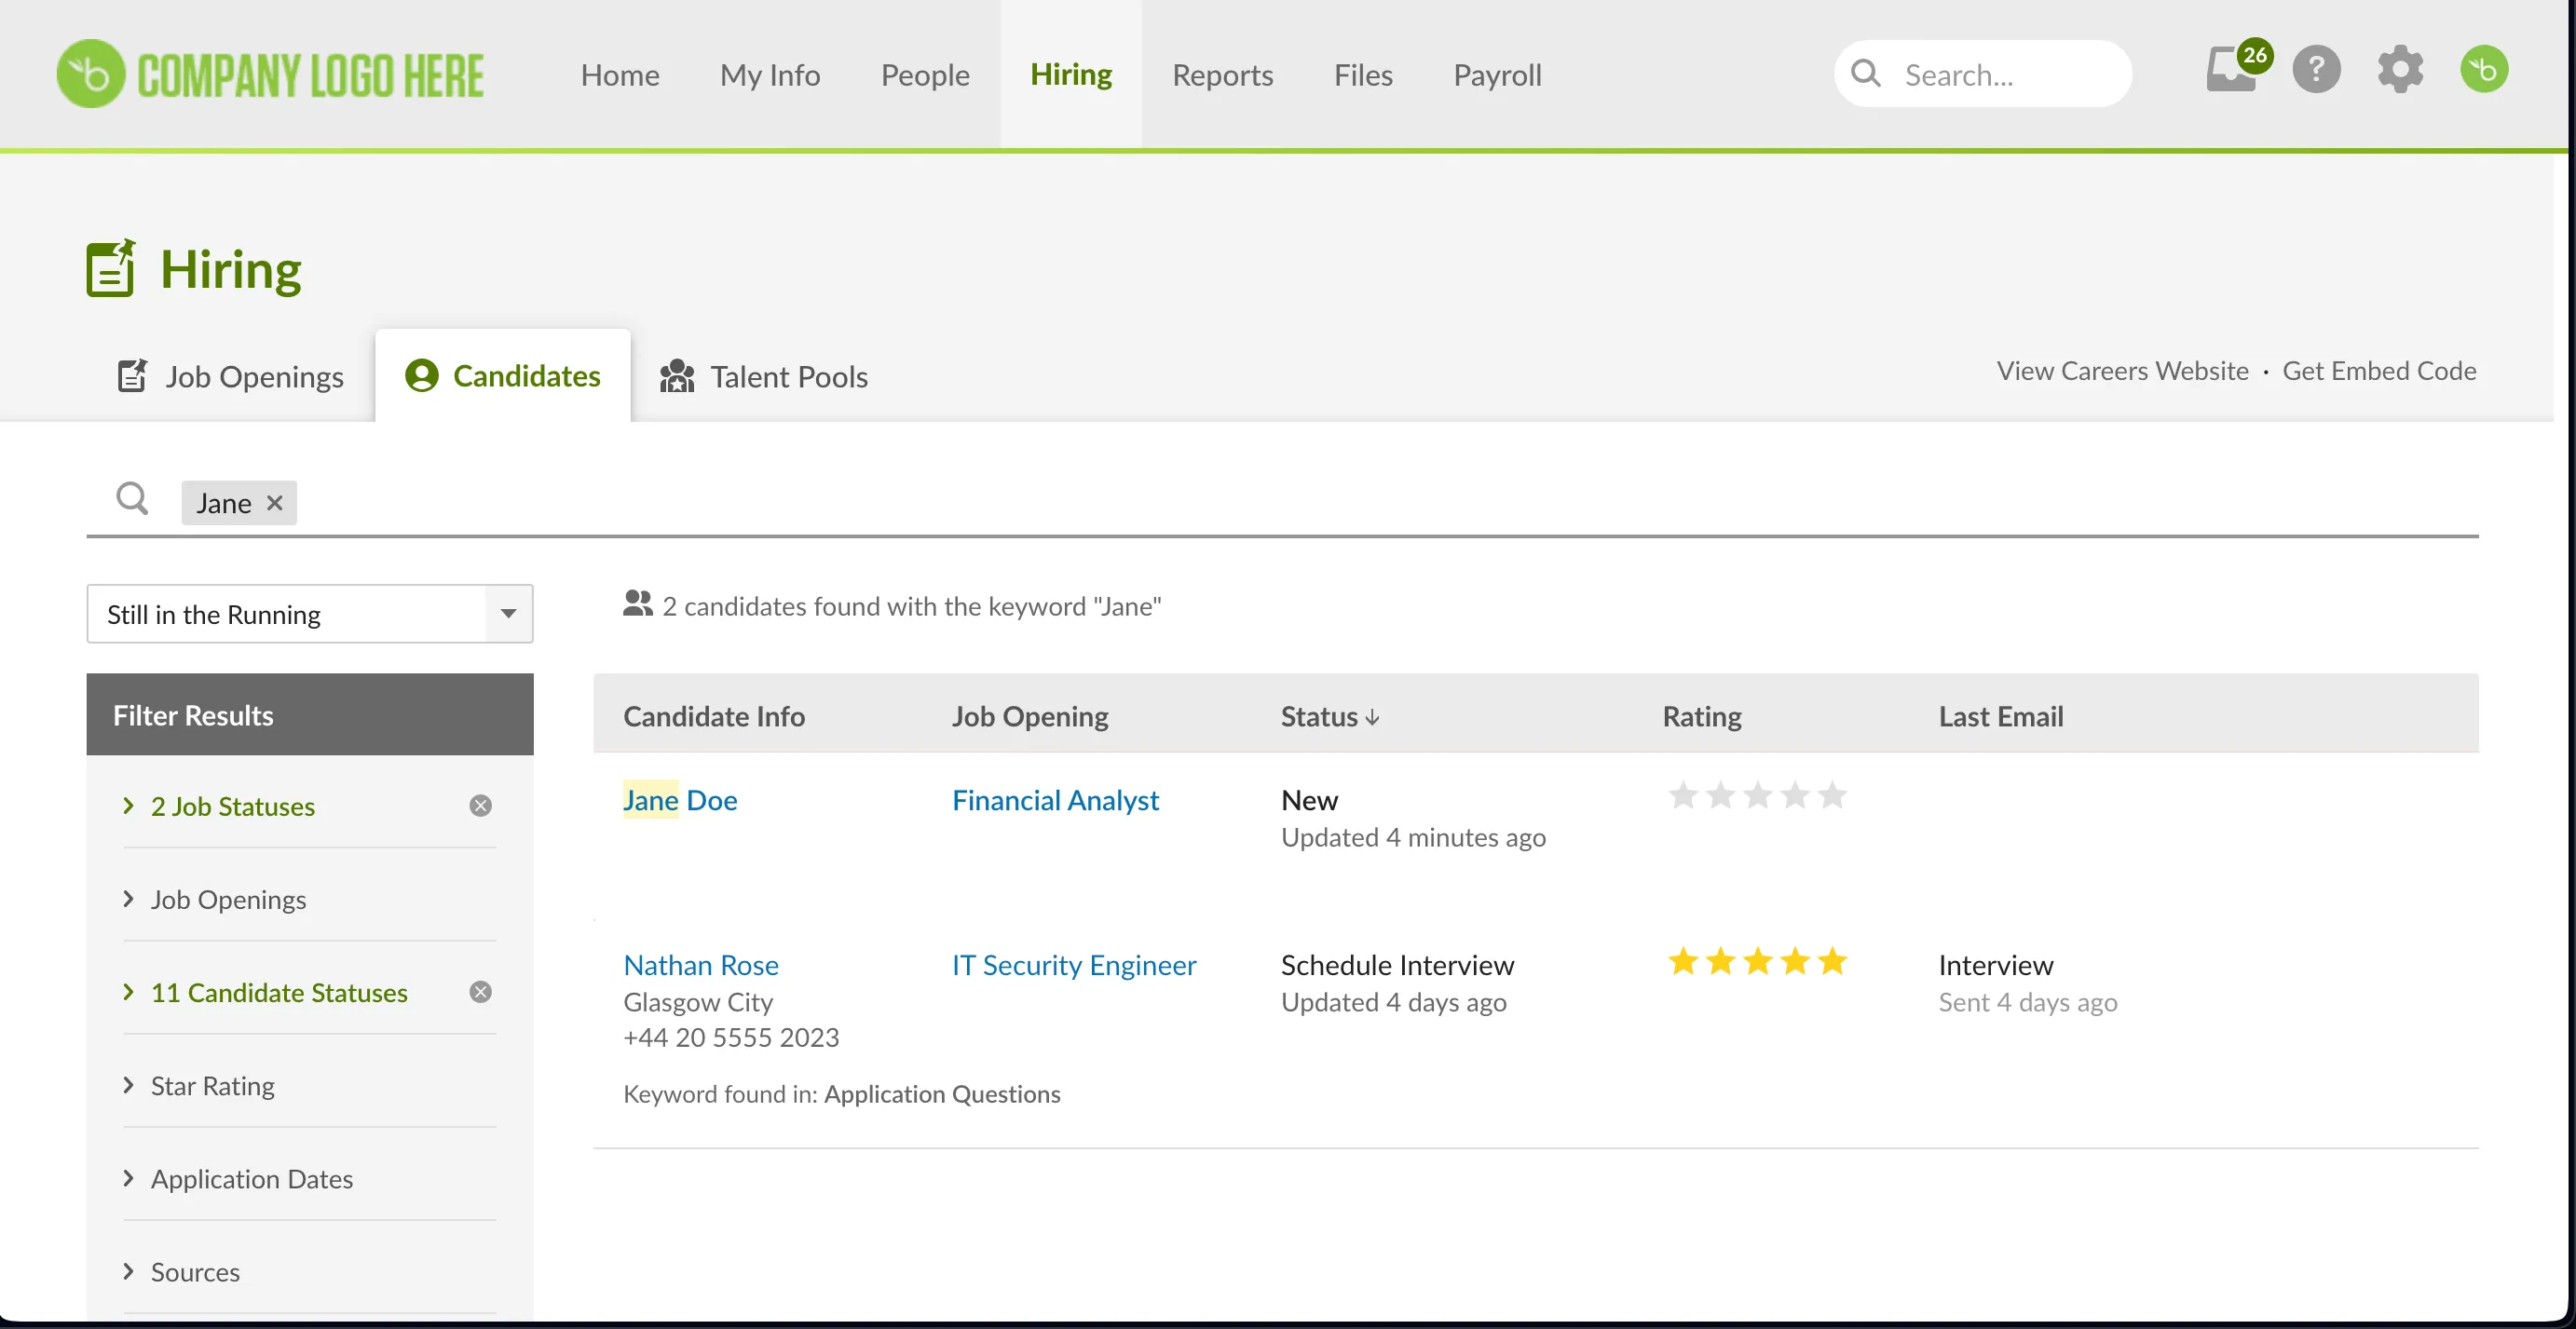
To confirm that the candidate was created, go to your BambooHR account, navigate to Hiring from the top navigation bar, and then select Candidates. Search for the candidate you've created. In this case, you should see Jane Doe:

And that's it! You can find the code for this article in this GitHub repository.
For more information on other applicant tracking APIs, check out the BambooHR Official API documentation.
Final thoughts
Your clients likely use a variety of HRIS solutions.
You can broaden the integrations you offer quickly and easily by building to Merge's HRIS Unified API. Once connected to the API, you’ll be able to offer 50+ integrations, which include tools like BambooHR, Workday, Namely, and UKG.
To get a deeper understanding of Merge, you can schedule a demo with one of our integration experts.


.png)
.png)
